How to annoy your friends with a Raspberry Pi and a buzzer
25 Sep 2019I recently got my hands on a Raspberry Pi 0 and I needed to find a fun, productive application so that I can learn how to use it. One of my great source of joy is to annoy my S.O., so why not get started with that?
Project description: Make an annoying buzz sound with the RPi. It should be controllable from my cellphone for added fun. This project is quite simple but it will put all the blocks in place to control some device from my cellphone. I was thinking of a way to water our plants during vacations. But that’s the topic for another post.
Caution advice: You can destroy your raspberry pi if you are not careful. Please be careful.
The hardware
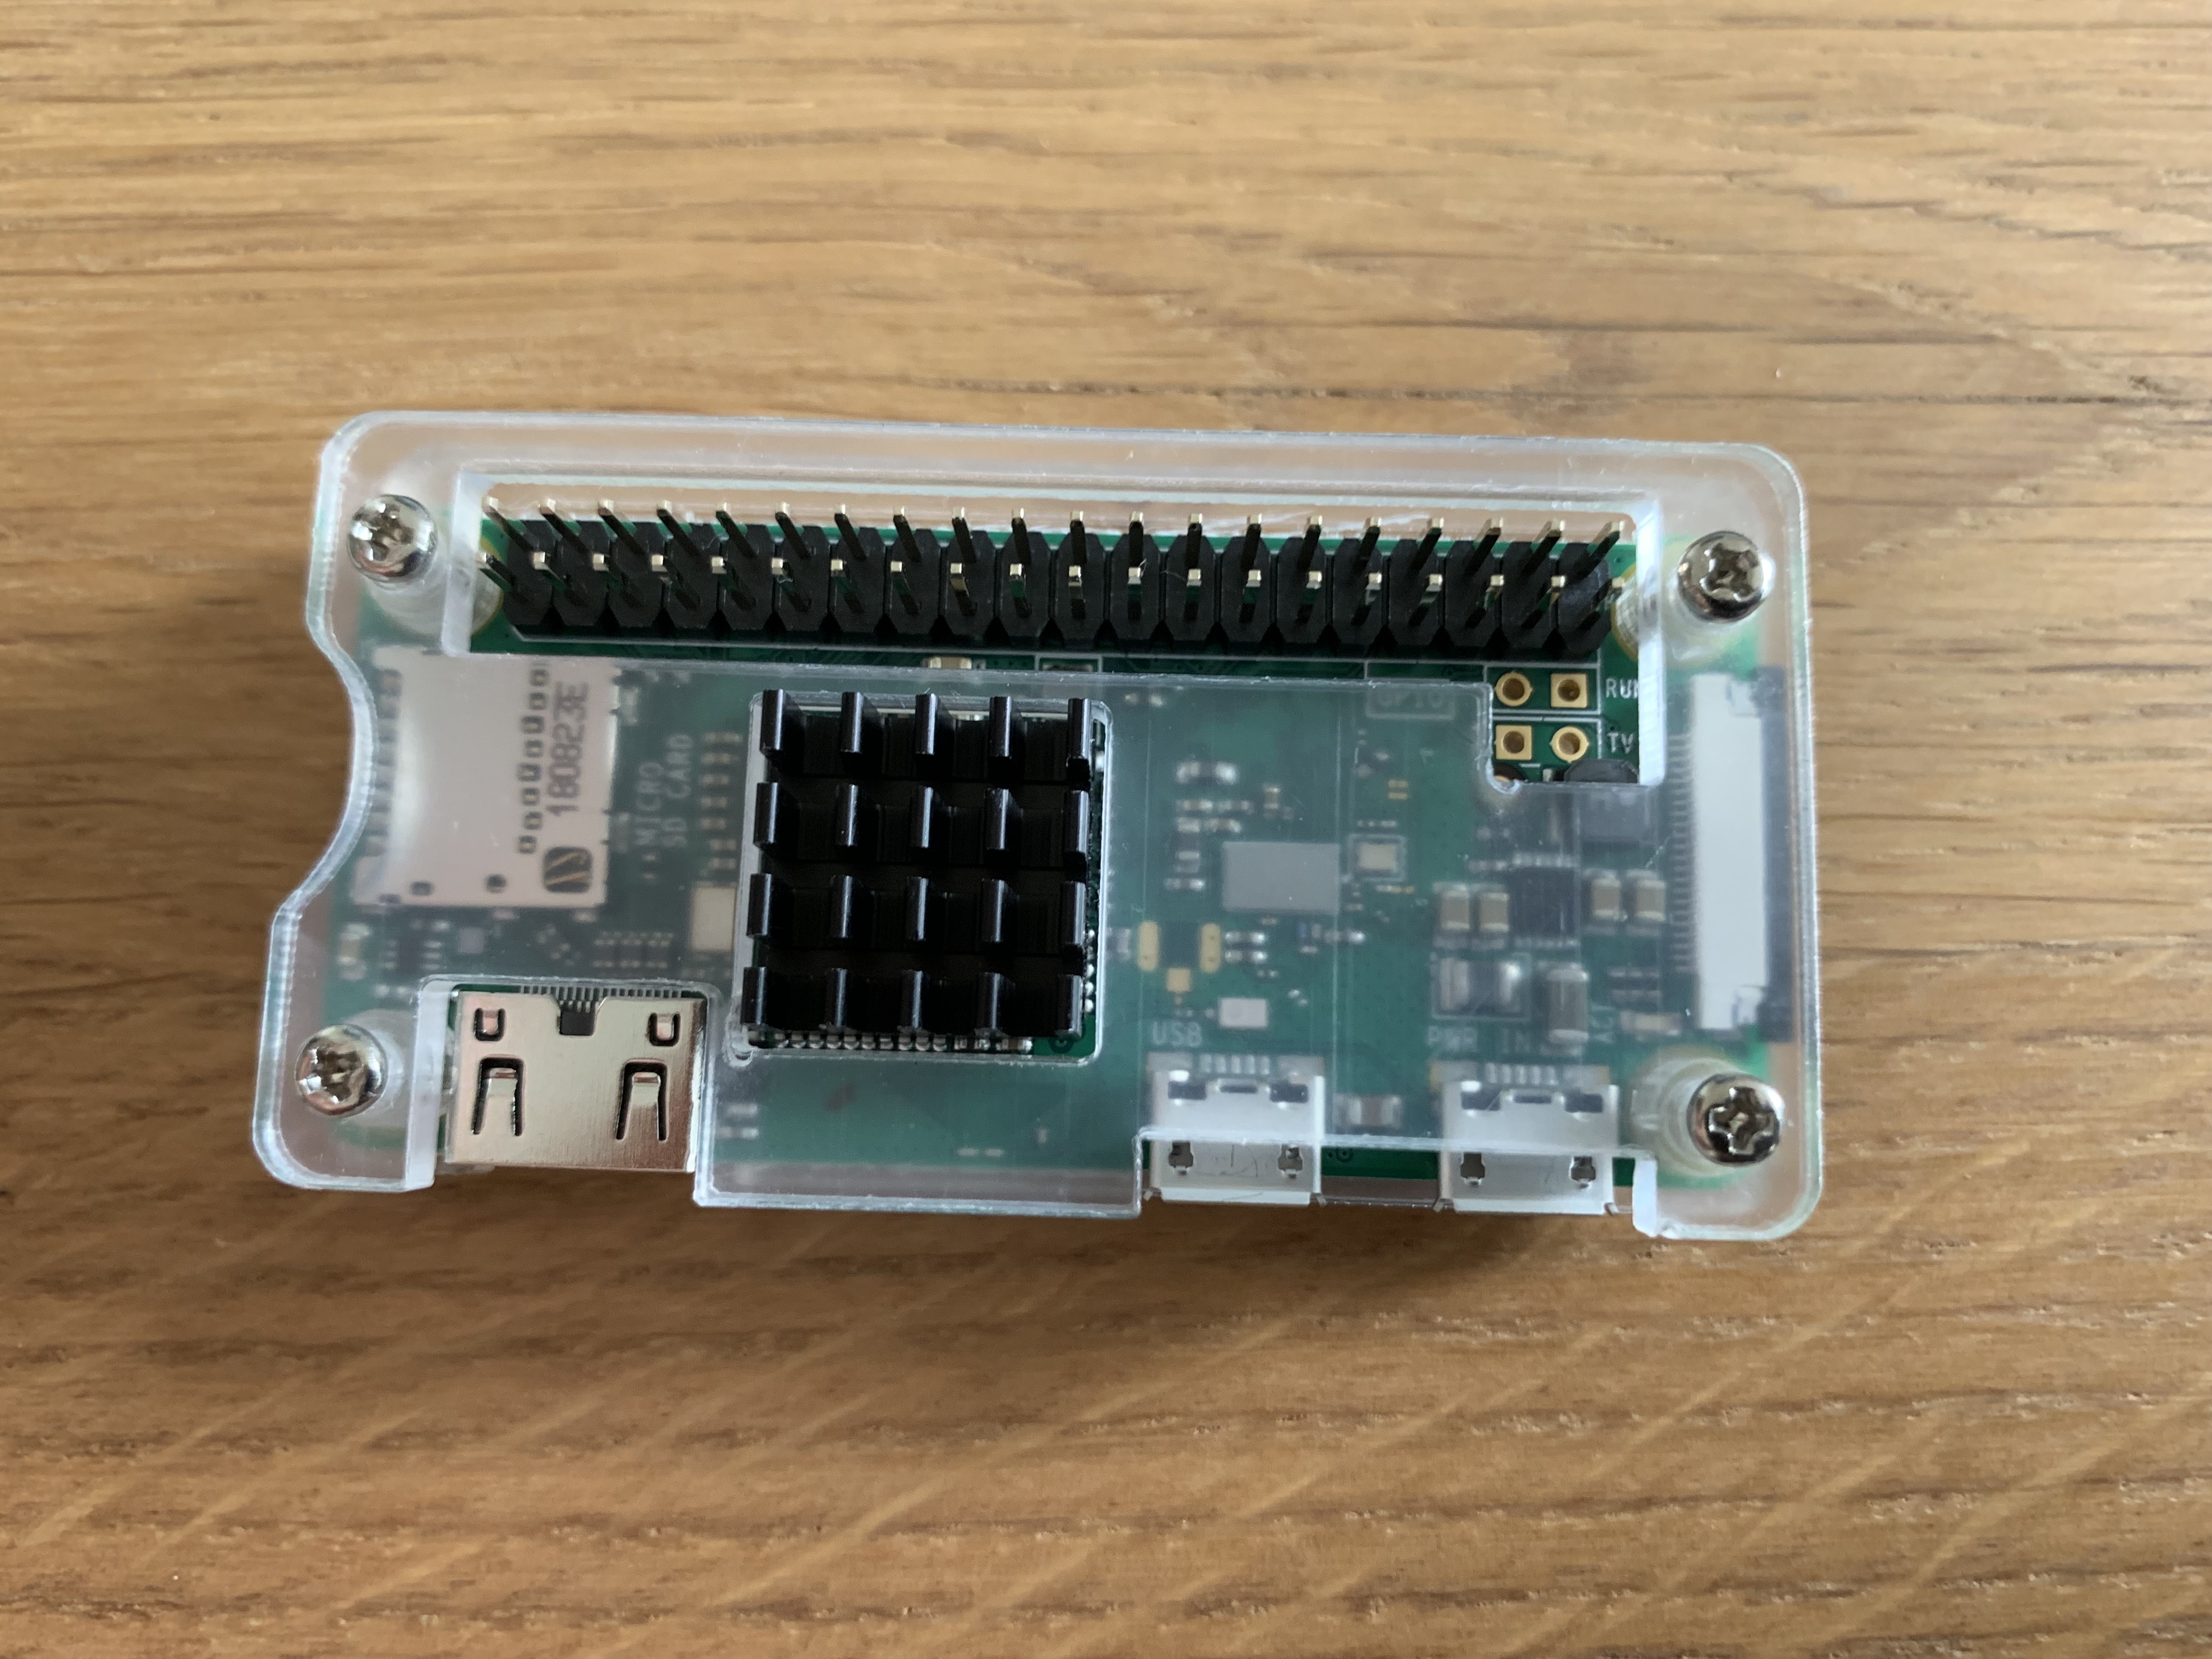
The RaspberryPi:
Some starter kit from Elegoo:
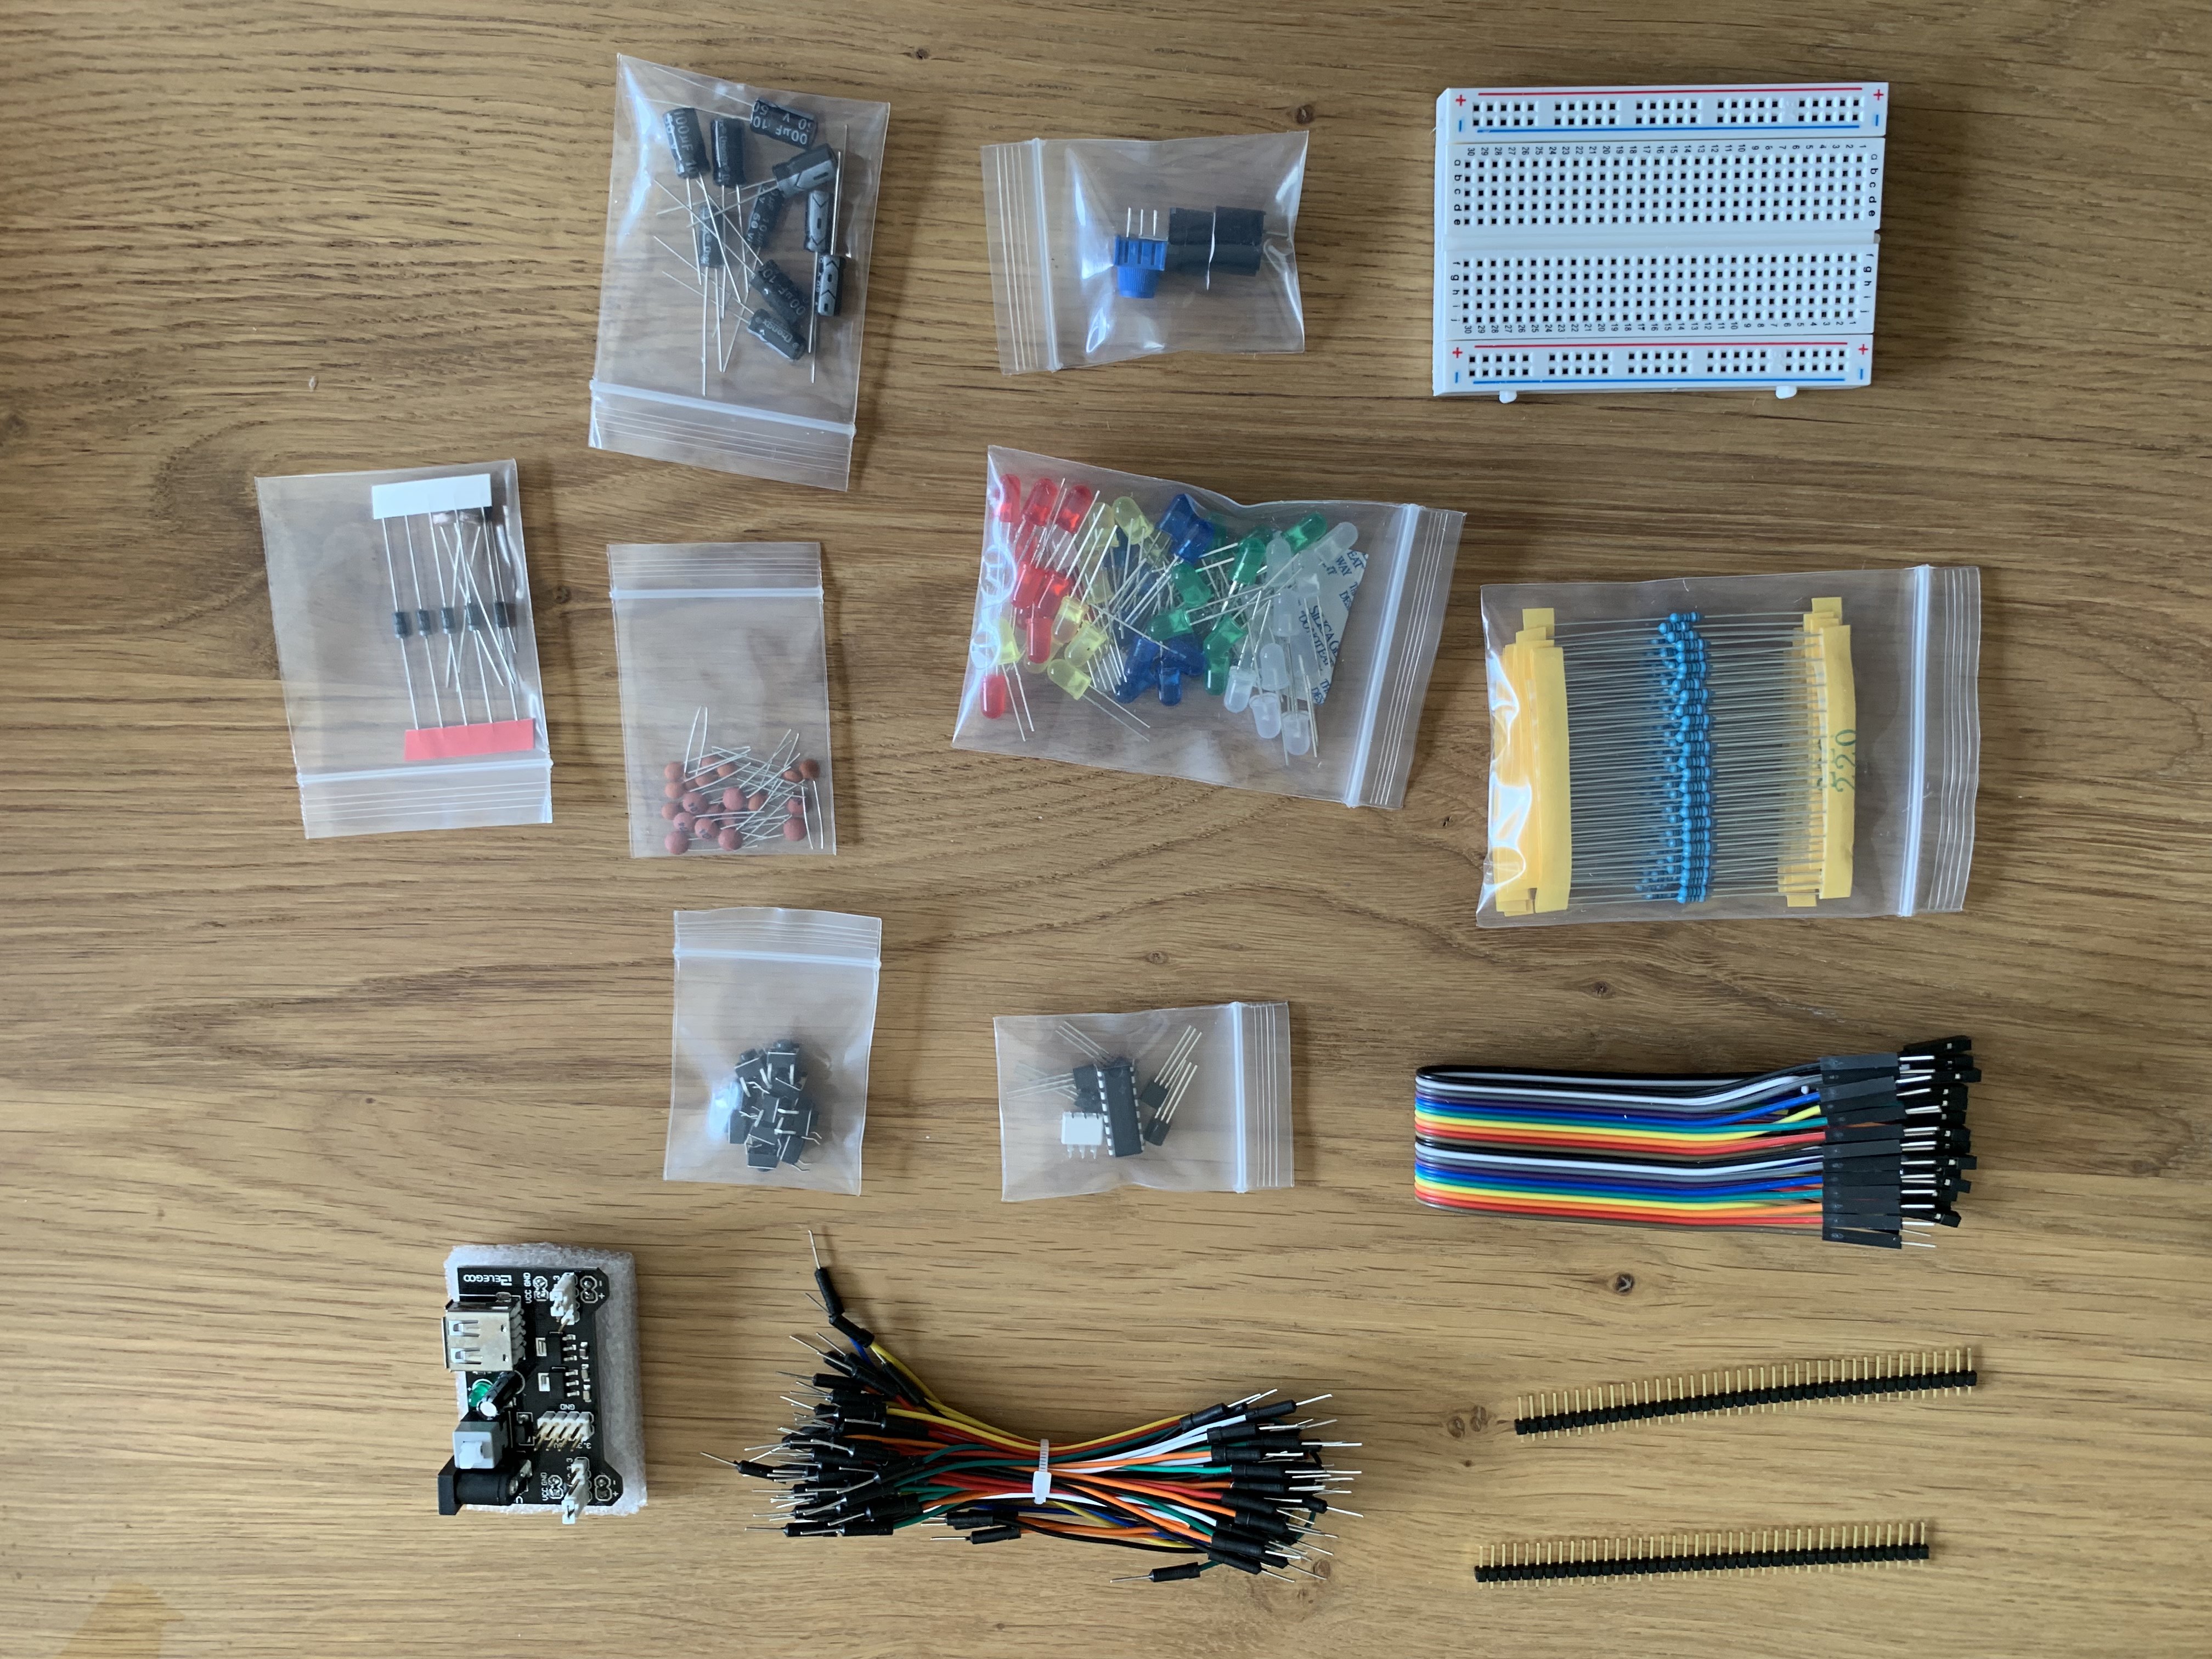
The starter kit is pretty nice. It provides a lot of basic components that can be used in Arduino/Raspberry projects. It also provides an active buzzer, main source of annoyment of today. The cool thing with the active buzzer is that you just have to plug it to a power source to make noise.
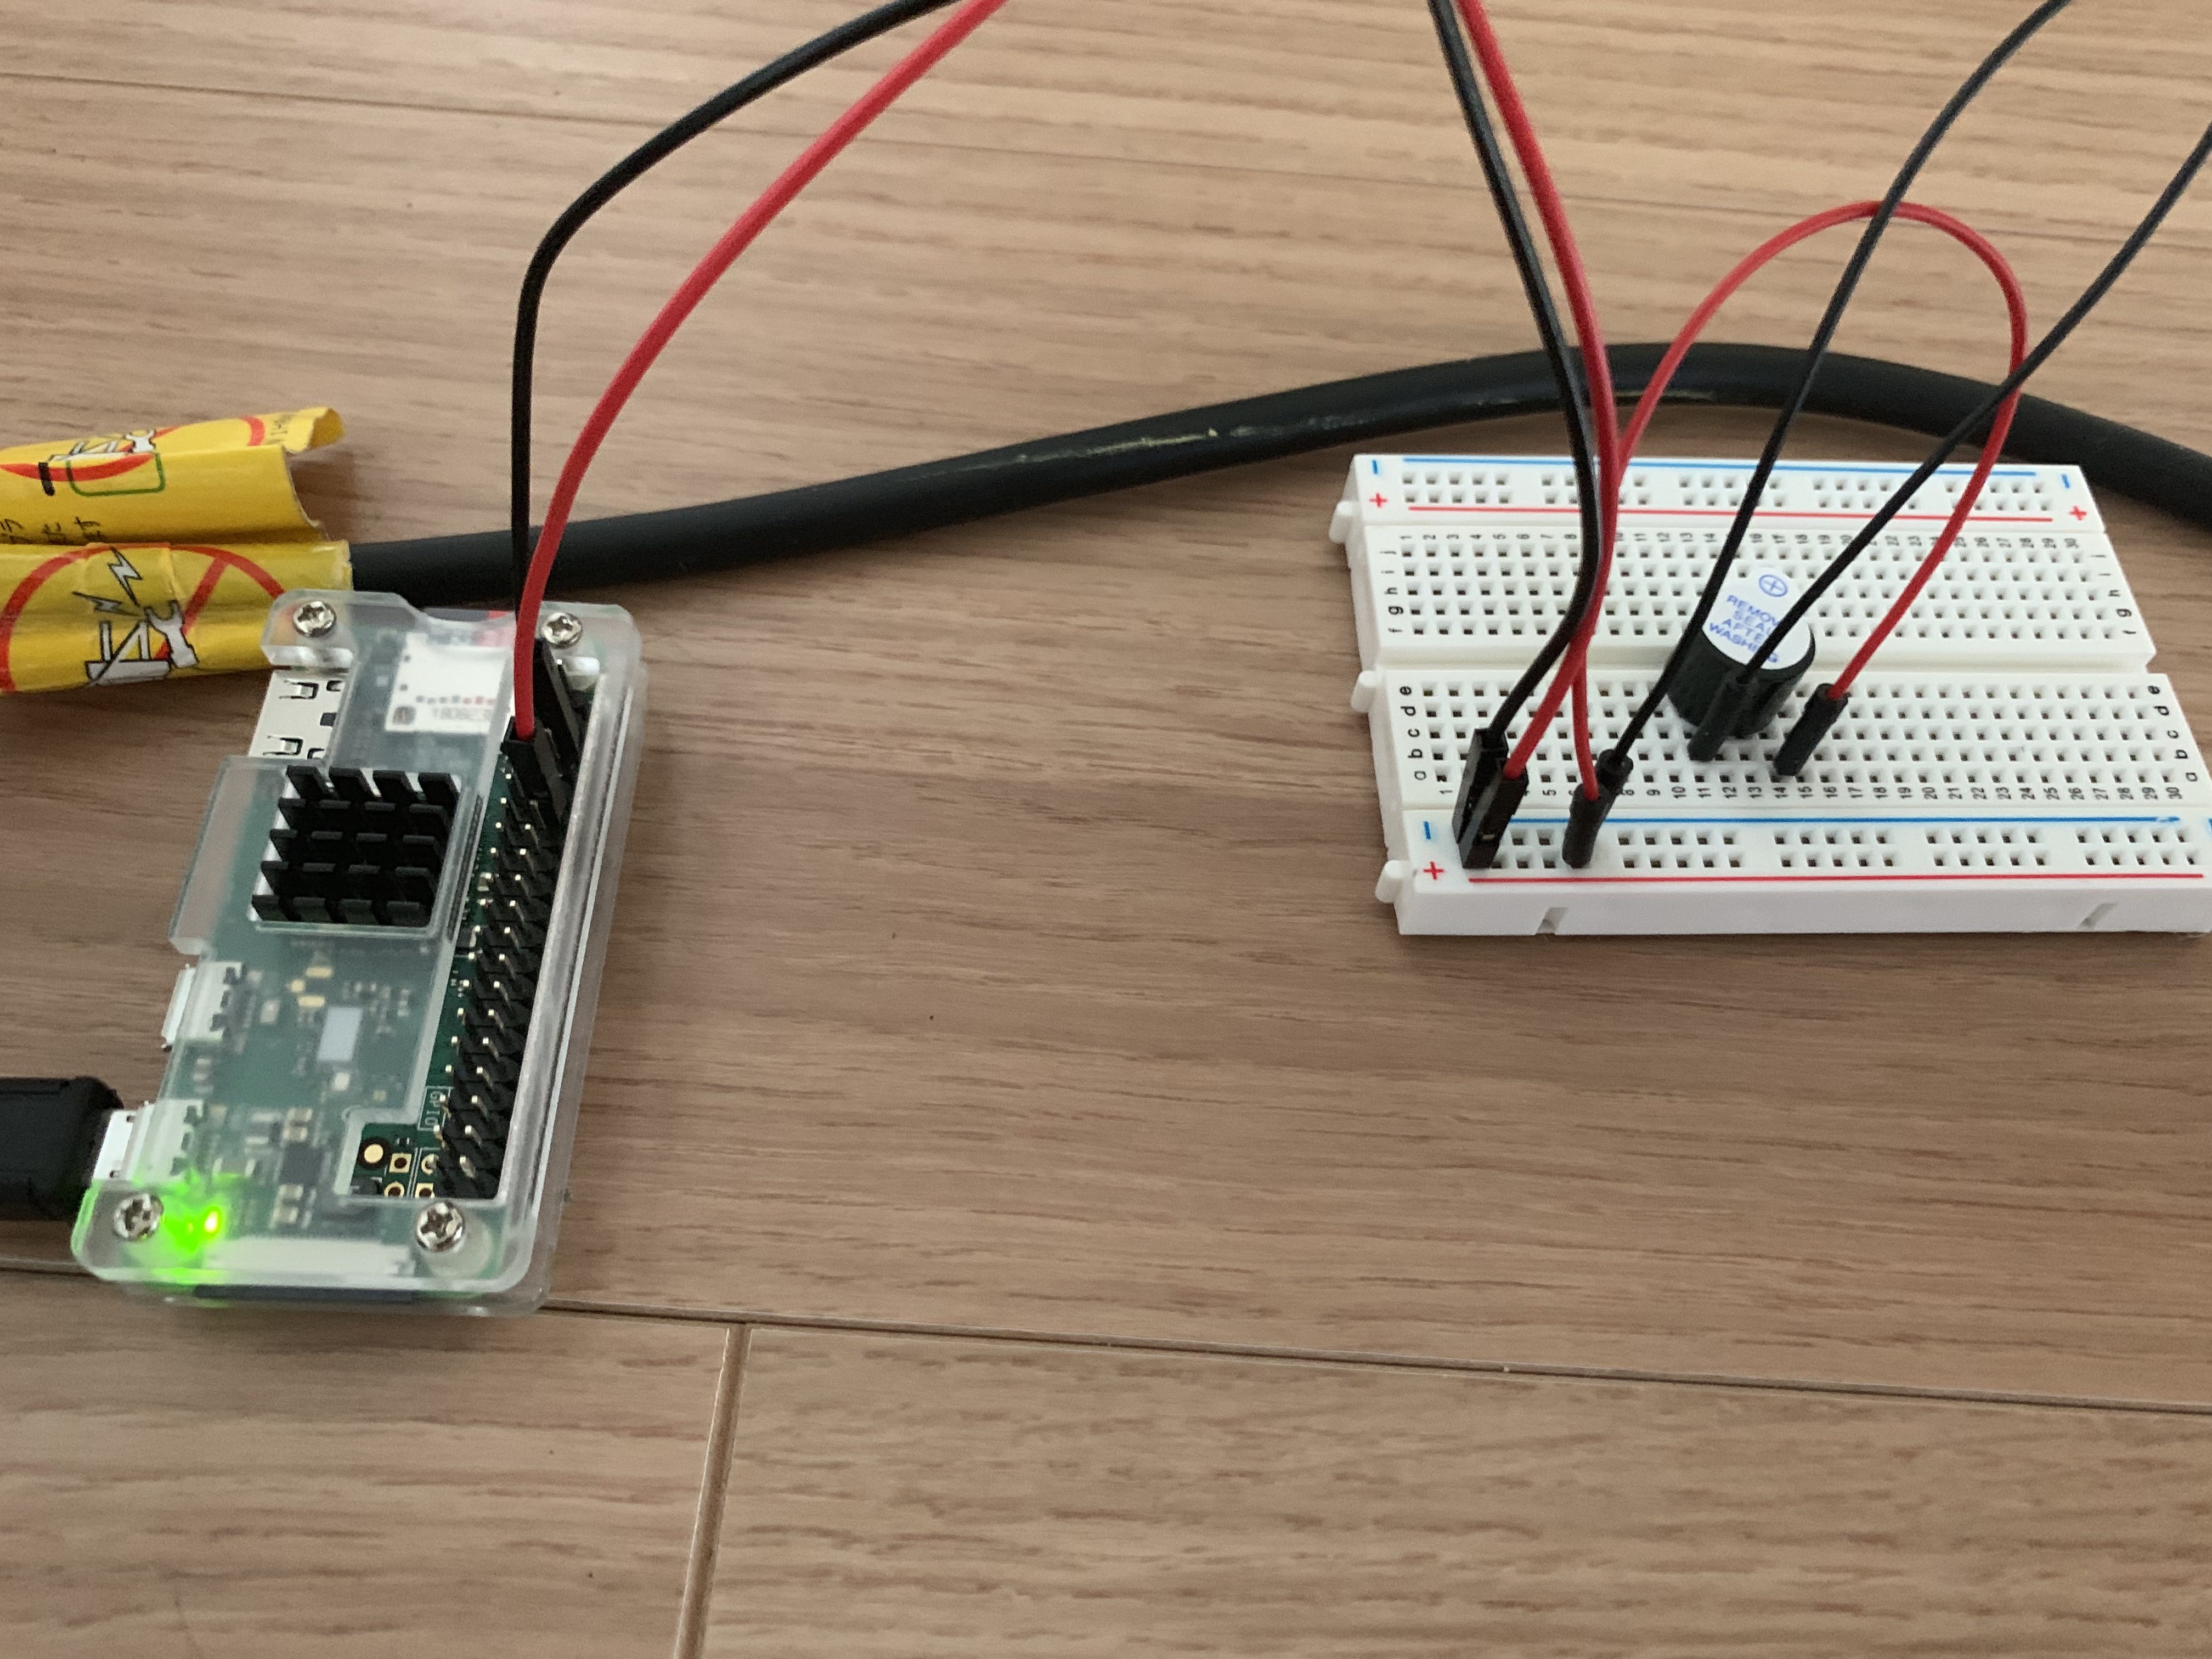
It’s easy to test. Plug it with the 3.3V power source to make the noise. The setup with the GPIO is also simple. Just make sure the buzzer is in the correct direction.
The software
There will be software running on the RPi, and software running somewhere else that will handle the requests from my cellphone.
The code on the RPi will:
- Send value to GPIO pin to make the buzzer buzz;
- Listen from new annoyance requests.
To send requests to the raspberry Pi from my cellphone, wherever the place I am, I will use a Telegram bot which has
its code deployed in AWS Lambda. I am using lambda here as an alternative to ec2. It’s not the only way to do it
but it shows how you can use a cheap lambda to create bots (Telegram, Slack…).
Additionally, I will need the AWS API gateway to forward HTTP requests to the correct lambda. I’ll also use a small
DynamoDB to store the requests from my cellphone. The software on the RPI will query this table to see if it needs
to annoy my S.O.
GPIO control with Rust on the RPI
There is already a crate for that, but in my case I’ll just write the code from scratch as the use case is really simple.
Interaction with the GPIO pins is simple with sysfs. Be aware that this interface is deprecated so this example might have to use the new interface in the future…
# activate the gpio pin 18
echo "18" > /sys/class/gpio/export
# Set the direction (output in that case)
echo "out" > /sys/class/gpio/gpio18/direction

# set value high
echo "1" > /sys/class/gpio/gpio18/value
# wait a bit
...
# set value low
echo "0" > /sys/class/gpio/gpio18/value

# deactivate the gpio pin
echo "18" > /sys/class/gpio/unexport
When converting that to Rust, I have:
//! Code to light a led on GPIO pin 18.
//!
use std::fs::OpenOptions;
use std::io::Write;
use std::path::Path;
use std::thread;
use std::time::Duration;

use snafu::{ResultExt, Snafu};

#[derive(Debug, Snafu)]
enum GpioError {
    #[snafu(display("Cannot open file"))]
    CannotOpen { source: std::io::Error },

    #[snafu(display("Cannot write bytes to file: {:?}", bytes))]
    CannotWriteBytes {
        source: std::io::Error,
        bytes: Vec<u8>,
    },
}

struct Pin {
    pin: u8,
}

const EXPORT_PATH: &'static str = "/sys/class/gpio/export";
const UNEXPORT_PATH: &'static str = "/sys/class/gpio/unexport";

pub enum Direction {
    In,
    Out,
}

pub enum Value {
    On,
    Off,
}

fn write_to_file<P: AsRef<Path>>(filepath: P, content: &str) -> Result<(), GpioError> {
    let mut file = OpenOptions::new()
        .write(true)
        .open(filepath)
        .context(CannotOpen {})?;
    file.write_all(content.as_bytes())
        .context(CannotWriteBytes {
            bytes: Vec::from(content.as_bytes()),
        })?;
    Ok(())
}

impl Pin {
    pub fn new(pin: u8) -> Self {
        Self { pin }
    }

    /// Will activate the GPIO pin. If was already activated, this will
    /// just return Ok.
    pub fn export(&self) -> Result<(), GpioError> {
        if !Path::new(&format!("/sys/class/gpio/gpio{}", self.pin)).exists() {
            write_to_file(EXPORT_PATH, &format!("{}", self.pin))
        } else {
            Ok(())
        }
    }

    /// Will deactivate the GPUI pin. If was already deactivate, this will
    /// just return OK.
    pub fn unexport(&self) -> Result<(), GpioError> {
        if Path::new(&format!("/sys/class/gpio/gpio{}", self.pin)).exists() {
            write_to_file(UNEXPORT_PATH, &format!("{}", self.pin))
        } else {
            Ok(())
        }
    }

    /// Set direction (IN or OUT).
    pub fn set_direction(&self, direction: Direction) -> Result<(), GpioError> {
        match direction {
            Direction::In => {
                write_to_file(format!("/sys/class/gpio/gpio{}/direction", self.pin), "in")
            }
            Direction::Out => {
                write_to_file(format!("/sys/class/gpio/gpio{}/direction", self.pin), "out")
            }
        }
    }

    /// Set either "1" or "0" to the GPIO pin.
    pub fn set_value(&self, value: Value) -> Result<(), GpioError> {
        match value {
            Value::On => write_to_file(format!("/sys/class/gpio/gpio{}/value", self.pin), "1"),
            Value::Off => write_to_file(format!("/sys/class/gpio/gpio{}/value", self.pin), "0"),
        }
    }
}

fn main() -> Result<(), GpioError> {
    let led = Pin::new(18);
    led.export()?;
    thread::sleep(Duration::from_millis(100));
    led.set_direction(Direction::Out)?;
    thread::sleep(Duration::from_millis(100));

    for _ in 0..5 {
        led.set_value(Value::On)?;
        thread::sleep(Duration::from_millis(500));
        led.set_value(Value::Off)?;
        thread::sleep(Duration::from_millis(500));
    }

    led.unexport()?;
    Ok(())
}
I am using Snafu for error handling as part of a bigger project, but you can replace the custom errors with Box<std::error::Error> for quick and dirty prototyping.
Telegram bot with AWS Lambda
There are a lot of tutorials on how to create a bot for Telegram on the web. Creating a new bot is easy. Just send a message to the BotFather and
it will create a new bot and send you your bot token (that you should not share ;) ).
Every time somebody is sending a message to your bot, Telegram will keep it in its server for 24h and will wait for you to get them before removing them. There are two way to get messages sent to your bot:
- Poll telegram for updates
- Configure a webhook: an HTTP endpoint to which Telegram will try to send the update.
AWS basics
The second way works pretty well with AWS Lambda. The lambda is just a piece of code that will be run on AWS servers. You can run up to a million lambda a month for free instead of having you own server. When using Lambda, you often have to use other AWS services for integration. For example, if you want to trigger your piece of code from an HTTP requests, you need to use the API Gateway of AWS to forward the HTTP request to the lambda. If you want to keep some state, you need to use another service for that (S3, DynamoDB for example). On the bright side, AWS provides the free tiers, which means that if you keep your services usage below a certain threshold, you won’t pay anything.
Free tiers usage (roughly, please check details on AWS website):
- Lambda: 1M requests/month
- API Gateway: 1M API calls/month
- DynamoDB: 25Gb, 200M requests/month It’s well enough for the kind of joke I want to do.
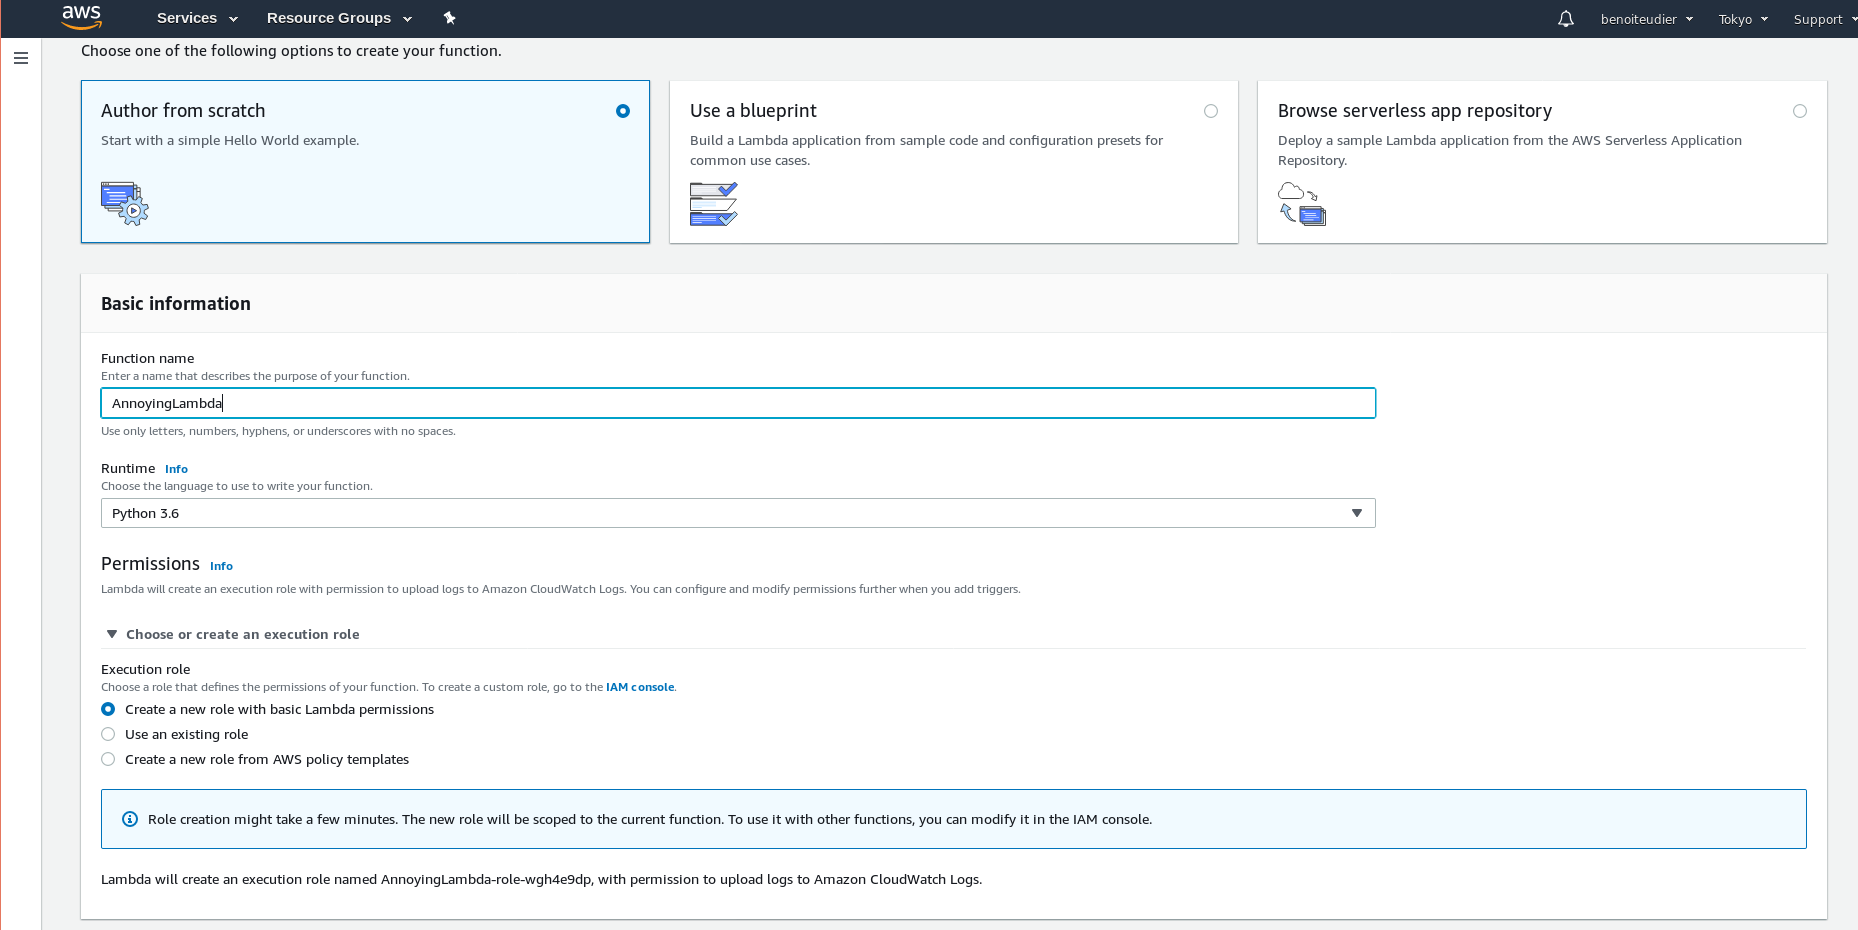
The first thing to do is to create a Lambda. On AWS GUI, you can choose what language to use and what permissions to give to the Lambda. For now, I’ll choose python and will give the standard permissions to lambda. Later, I will need to add the DynamoDB access.
The Lambda expects you to provide a handler that will be run when the lambda is triggered. The basic example of handler is:
import json

def lambda_handler(event, context):
    # TODO implement
    return {
        'statusCode': 200,
        'body': json.dumps('Hello from Lambda!')
    }
Now, I am going to create a new API to access this Lambda. This is done via the API gateway.
Just add a new resource which will be the endpoint for the Telegram webhook. Telegram advices to use your bot token as an endpoint
so let’s do it. Then, add a method for the endpoint. The method corresponds to the HTTP method. It will tell AWS how to handle GET, POST (and so on)
requests that are sent to our resource. Telegram will post the updates to our endpoint. When creating the method, you can choose what to
do when AWS receives a request. In this case, you can choose to forward to your lambda by choosing Lambda proxy. I am going a bit fast here but there
are a ton of AWS tutorials on the web.

When you deploy your API gateway and post some data to the endpoint you defined previously, you should get the return value from the lambda. (Hello from Lambda!)
Telegram bot code
First thing to do is to register your bot webhook (the endpoint from AWS). There are a lot of details here. I did it simply with python’s request.
import requests

# Certificate is a public certificate from AWS
data = { 'url': 'mysecretendpoint', 'certificate': open(certificate_path) }

requests.post(f'https://api.telegram.org/bot{TOKEN}/setWebhook', data=data)
I downloaded the certificate from the web browser when access a GET endpoint of the API Gateway. Not sure it is needed…
The requests should return a status 200. If that is the case, you can check that the Lambda is correctly triggered by sending a message to your bot.
Telegram sends a post request that contains an Update to your endpoint. The update contains information about who sent the message and what is the
content of the message. You can find the details in the Telegram API documentation.
The documentation is pretty well made so you can easily do stuff such as an echo bot.
from botocore.vendored import requests
import json

URL = 'https://api.telegram.org/bot_with_you_token/sendMessage'

def lambda_handler(event, context):

    body = json.loads(event['body'])

    # Process only if myself
    text = body['message']['text']
    chat_id = body['message']['chat']['id']
    requests.post(URL, data={'chat_id': chat_id, 'text': text})

    return {
        'statusCode': 200,
        'body': json.dumps('Hello from Lambda!')
    }
Maybe you do not want everybody to be able to get the echo message? In that case, you can filter by user as the user ID is available
from body['message']['from']['id'].
The complete Lambda code is the following:
import json
import os
import datetime
import pytz
from botocore.vendored import requests

import boto3
dynamodb = boto3.resource('dynamodb')

TOKEN =  os.environ['TELEGRAM_TOKEN']
URL = f'https://api.telegram.org/bot{TOKEN}/sendMessage'

def get_allowed_users():
    liststr = os.environ['ALLOWED_USERS']
    return [int(x) for x in liststr.split(',')]

# This is a workaround for: http://bugs.python.org/issue16535
class DecimalEncoder(json.JSONEncoder):
    def default(self, obj):
        if isinstance(obj, decimal.Decimal):
            return int(obj)
        return super(DecimalEncoder, self).default(obj)


def create_entry(dt: str):
    """ Will create a new entry in the dynamotable. Key will be the current
    datetime"""
    table = dynamodb.Table(os.environ['DYNAMODB_TABLE'])
    item = {
        'datetime': dt,
        'request': 'sound',
    }
    # the primary key is request.
    table.put_item(Item=item)


def send_msg(chat_id, msg):
    r = requests.post(URL, data={'chat_id': chat_id, 'text': msg})
    print(r.text)

def lambda_handler(event, context):

    body = json.loads(event['body'])

    # Process only if myself
    user_id = body['message']['from']['id']
    if user_id in get_allowed_users():
        text = body['message']['text']
        chat_id = body['message']['chat']['id']
        if text.startswith('/sound'):
            now = datetime.datetime.now()
            tz = pytz.timezone('Asia/Tokyo')
            now = tz.localize(now)
            create_entry(now.isoformat())
            msg = f"OK I RECEIVED YOUR REQUEST AT {now.isoformat()}"
        else:
            msg = 'Type /sound to prank you friends'
        send_msg(chat_id, msg)

    return {
        'statusCode': 200,
        'body': json.dumps('Hello from Lambda!')
    }
A few important points:
- I use a third-party python module (
pytz) that is not provided by AWS. To do the same, you can follow these instructions. - All the sensitive information is set as environment variable on the Lambda.
- The Lambda needs access to the DynamoDB table. This can be done by attaching a policy to the IAM role of your lambda function.
- The dynamo DB table primary key is
request.
RPI polling Lambda
The Raspberry Pi will poll for updates. This can also be done via a Lambda:
import json
import boto3
import json
import decimal
import os

from boto3.dynamodb.conditions import Key

dynamodb = boto3.resource('dynamodb')

# Helper class to convert a DynamoDB item to JSON.
class DecimalEncoder(json.JSONEncoder):
    def default(self, o):
        if isinstance(o, decimal.Decimal):
            if o % 1 > 0:
                return float(o)
            else:
                return int(o)
        return super(DecimalEncoder, self).default(o)


def lambda_handler(event, context):
    table = dynamodb.Table(os.environ['DYNAMODB_TABLE'])
    response = table.scan()

    # could have some problem? I guess. Anyway nobody else is reading/updating these values.
    for r in response['Items']:
        table.delete_item(Key={'request': r['request']})

    print(response)

    return {
        'statusCode': 200,
        'body': json.dumps({'items': response['Items']})
    }
That’s a really hacky way to get all the requests and delete them (what if multiple lambda access at the same time?). It’s not meant for any production system so that will do the trick. Another resource/method need to be created on the API gateway to give access to that Lambda.
Then, from the Raspberry Pi, reqwest and serde are used to get the latest requests. std::process::Command is used to execute the program created at the beginning of this post.
use serde_derive::{Deserialize, Serialize};
use std::env;
use std::process::Command;
use std::thread;
use std::time::Duration;

#[derive(Debug, Serialize, Deserialize)]
struct Request {
    request: String,
    datetime: String,
}

#[derive(Debug, Serialize, Deserialize)]
struct Response {
    items: Vec<Request>,
}

// Every minute polling
const POLLING_PERIOD: u64 = 5;

fn main() {
    // Some simple CLI args requirements...
    let url = match env::args().nth(1) {
        Some(url) => url,
        None => {
            println!("Usage: client <url>");
            return;
        }
    };

    let duration = Duration::from_secs(POLLING_PERIOD);
    loop {
        let mut res = reqwest::Client::new()
            .get(&url)
            .send()
            .expect("Cannot send get req");

        let response: Response = res.json().expect("Cannot deserialize");

        println!("{:?}", response);
        if response.items.len() != 0 {
            // TODO Do something different based on the request.
            Command::new("./led").output().expect("hi");
        }
        thread::sleep(duration);
    }
}
In Summary
- The RPi is constantly polling an AWS Lambda for new requests
- New requests are sent via a Telegram bot
- Telegram will forward the requests to an endpoint configured beforehand.
- This endpoint will trigger a lambda that will store the request for our RPi.
- The RPi will make an annoying sound when it receives a new request. The sound is triggered via GPIO pins and an active buzzer.
So much fun.