19 Dec 2019
All the work done in Wasm/Rust + WebGl makes it possible to write your game in Rust
and still have it working in the web browser. Not all the crates are available. Notably,
multithreading is not supported so ECS crates such as specs and legion are a bit restricted.
For rendering, WebGl2 provides an API close to modern opengl. The way to load assets however is specific to the web platform so I will provide some code here to help you load a texture from a web server. The code was adapted from the Mozilla documentation here.
use std::rc::Rc;
use wasm_bindgen::prelude::*;
use wasm_bindgen::JsCast;
use web_sys::console;
use web_sys::{
    HtmlImageElement, WebGl2RenderingContext, WebGlBuffer, WebGlProgram, WebGlShader, WebGlTexture,
};

/// Load a new texture :)
///
/// To do so, the texture image needs to be loaded from the server first. This is done
/// asynchronously in Javascript so we can upload the image to the GPU only after the image
/// is received on the client.
///
/// One trick is to create first the texture with one single blue pixel, then add a callback to
/// load the texture when the image is loaded. See here: https://developer.mozilla.org/en-US/docs/Web/API/WebGL_API/Tutorial/Using_textures_in_WebGL
pub fn load_texture(
    gl: &WebGl2RenderingContext,
    img_src: &str,
) -> Result<Rc<WebGlTexture>, JsValue> {
    let texture = gl.create_texture().expect("Cannot create gl texture");
    gl.bind_texture(WebGl2RenderingContext::TEXTURE_2D, Some(&texture));
    let level = 0;
    let internal_format = WebGl2RenderingContext::RGBA;
    let width = 1;
    let height = 1;
    let border = 0;
    let src_format = WebGl2RenderingContext::RGBA;
    let src_type = WebGl2RenderingContext::UNSIGNED_BYTE;

    // Now upload single pixel.
    let pixel: [u8; 4] = [0, 0, 255, 255];
    gl.tex_image_2d_with_i32_and_i32_and_i32_and_format_and_type_and_opt_u8_array(
        WebGl2RenderingContext::TEXTURE_2D,
        level,
        internal_format as i32,
        width,
        height,
        border,
        src_format,
        src_type,
        Some(&pixel),
    )?;

    let img = HtmlImageElement::new().unwrap();
    img.set_cross_origin(Some(""));

    let imgrc = Rc::new(img);

    let texture = Rc::new(texture);

    {
        let img = imgrc.clone();
        let texture = texture.clone();
        let gl = Rc::new(gl.clone());
        let a = Closure::wrap(Box::new(move || {
            gl.bind_texture(WebGl2RenderingContext::TEXTURE_2D, Some(&texture));

            if let Err(e) = gl.tex_image_2d_with_u32_and_u32_and_html_image_element(
                WebGl2RenderingContext::TEXTURE_2D,
                level,
                internal_format as i32,
                src_format,
                src_type,
                &img,
            ) {
                // TODO better error handling...
                console::log_1(&e);
                return;
            }

            // different from webgl1 where we need the pic to be power of 2
            gl.generate_mipmap(WebGl2RenderingContext::TEXTURE_2D);
        }) as Box<dyn FnMut()>);
        imgrc.set_onload(Some(a.as_ref().unchecked_ref()));

        // Normally we'd store the handle to later get dropped at an appropriate
        // time but for now we want it to be a global handler so we use the
        // forget method to drop it without invalidating the closure. Note that
        // this is leaking memory in Rust, so this should be done judiciously!
        a.forget();
    }

    imgrc.set_src(img_src);

    Ok(texture)
}
The trick
Use the HTML Image element to load from an URL and do the decoding. Then, the WebGl2Rendering context can use the content of the image element as a texture. Image download is done asynchronously. First, a texture is created with a single blue pixel. Then, a callback onload will upload the correct texture instead of the pixel.
During development, I often use some javascript server to create my web UI (Vuejs) and another rust server to serve the static files. It is problematic because the web browser (WebGl) will block the image loading because of CORS. To bypass this problem, your asset server can allow any origin.
Mandatory warp sample:
use warp::Filter;

fn main() {
    pretty_env_logger::init();

    let cors = warp::cors().allow_any_origin();
    let assets = warp::fs::dir("./assets/").with(cors);

    warp::serve(assets).run(([127, 0, 0, 1], 3031));
}
Another detail that is important. The img element will not send pre-flight requests by default, so the line img.set_cross_origin(Some("")); is mandatory.
Using with Rust
The asynchronous aspect of the texture loading means that we need to use javascript callback to do an action once the image is loaded. The way to do it with Rust is to use the Closure struct. The syntax is a bit funky so I’ll redirect you to the wasm_bindgen examples in the github repository.
Another important point
I am using WebGl2 because it is closer to modern opengl. If you want to use webgl1 for compatibility reasons, you will need to generate the mipmap a bit differently. See the Mozilla documentation.
Make sure you use WebGl2RenderingContext and not WebGlRenderingContext.
That’s all folks!
25 Sep 2019
I recently got my hands on a Raspberry Pi 0 and I needed to find a fun, productive application
so that I can learn how to use it. One of my great source of joy is to annoy my S.O., so why
not get started with that?
Project description:
Make an annoying buzz sound with the RPi. It should be controllable from my cellphone for added
fun. This project is quite simple but it will put all the blocks in place to control some device
from my cellphone. I was thinking of a way to water our plants during vacations. But that’s the
topic for another post.
Caution advice: You can destroy your raspberry pi if you are not careful. Please be careful.
The hardware
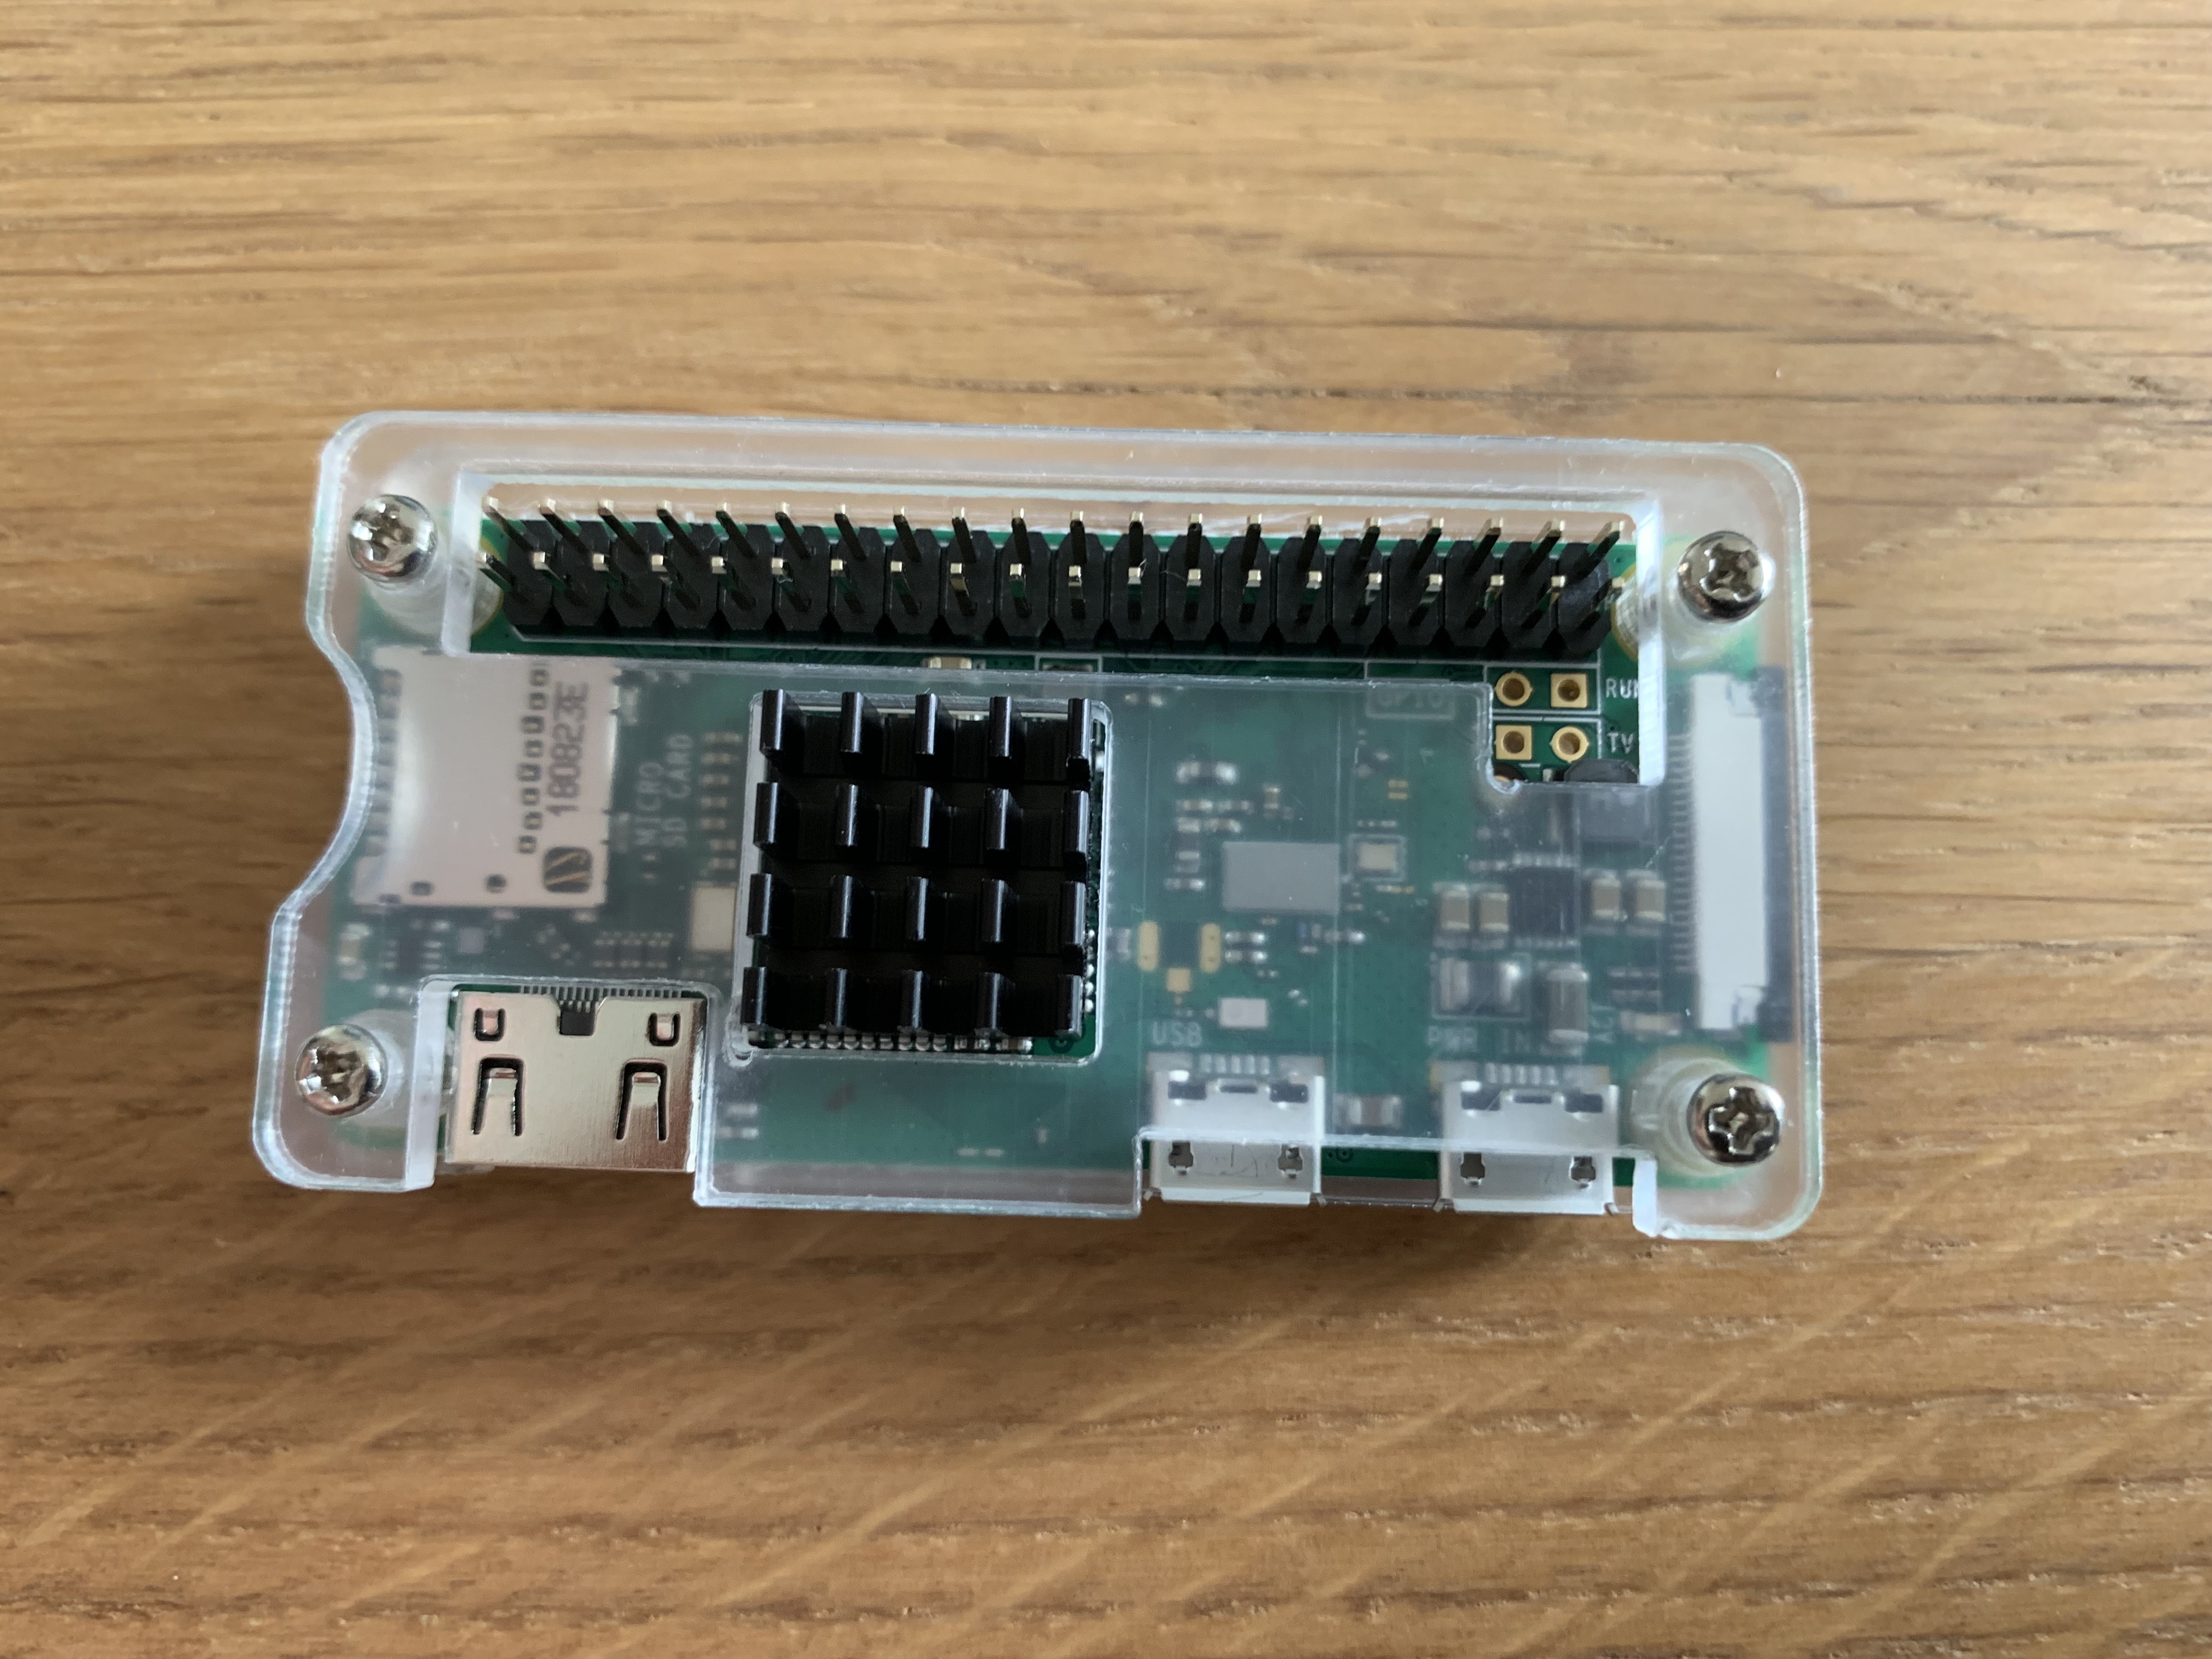
The RaspberryPi:
Some starter kit from Elegoo:
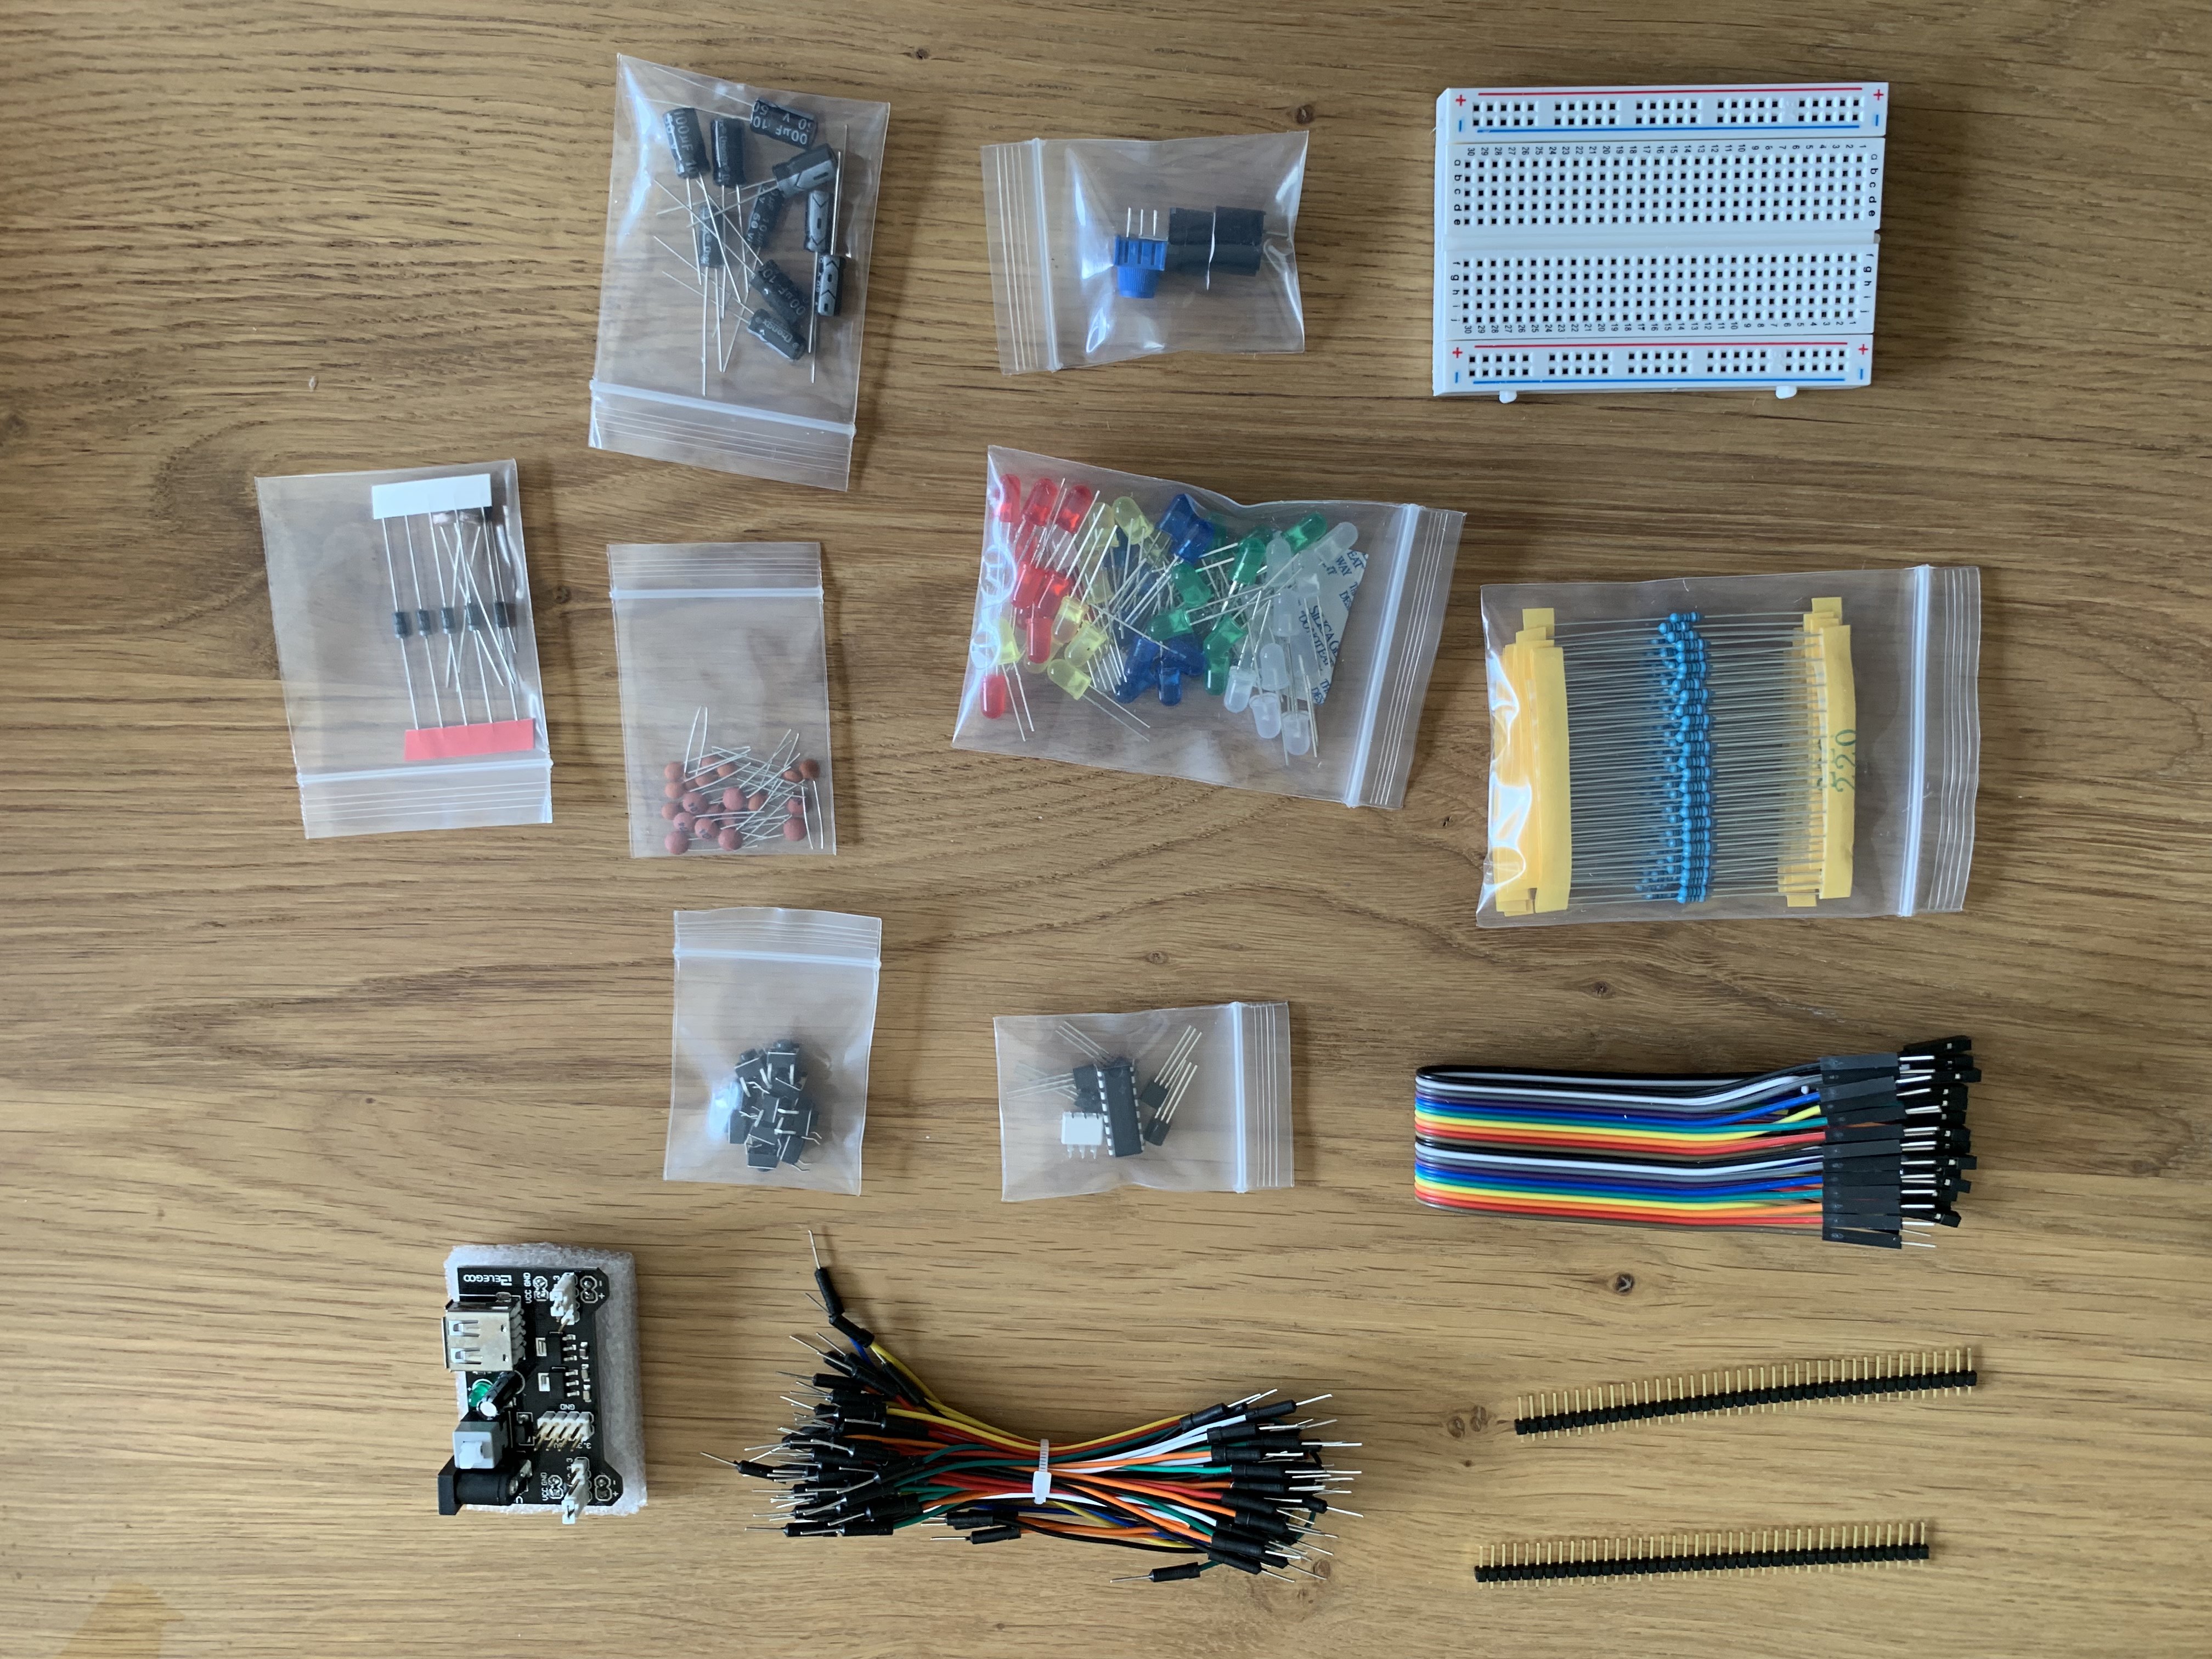
The starter kit is pretty nice. It provides a lot of basic components that can be used in Arduino/Raspberry
projects. It also provides an active buzzer, main source of annoyment of today. The cool thing with the active
buzzer is that you just have to plug it to a power source to make noise.
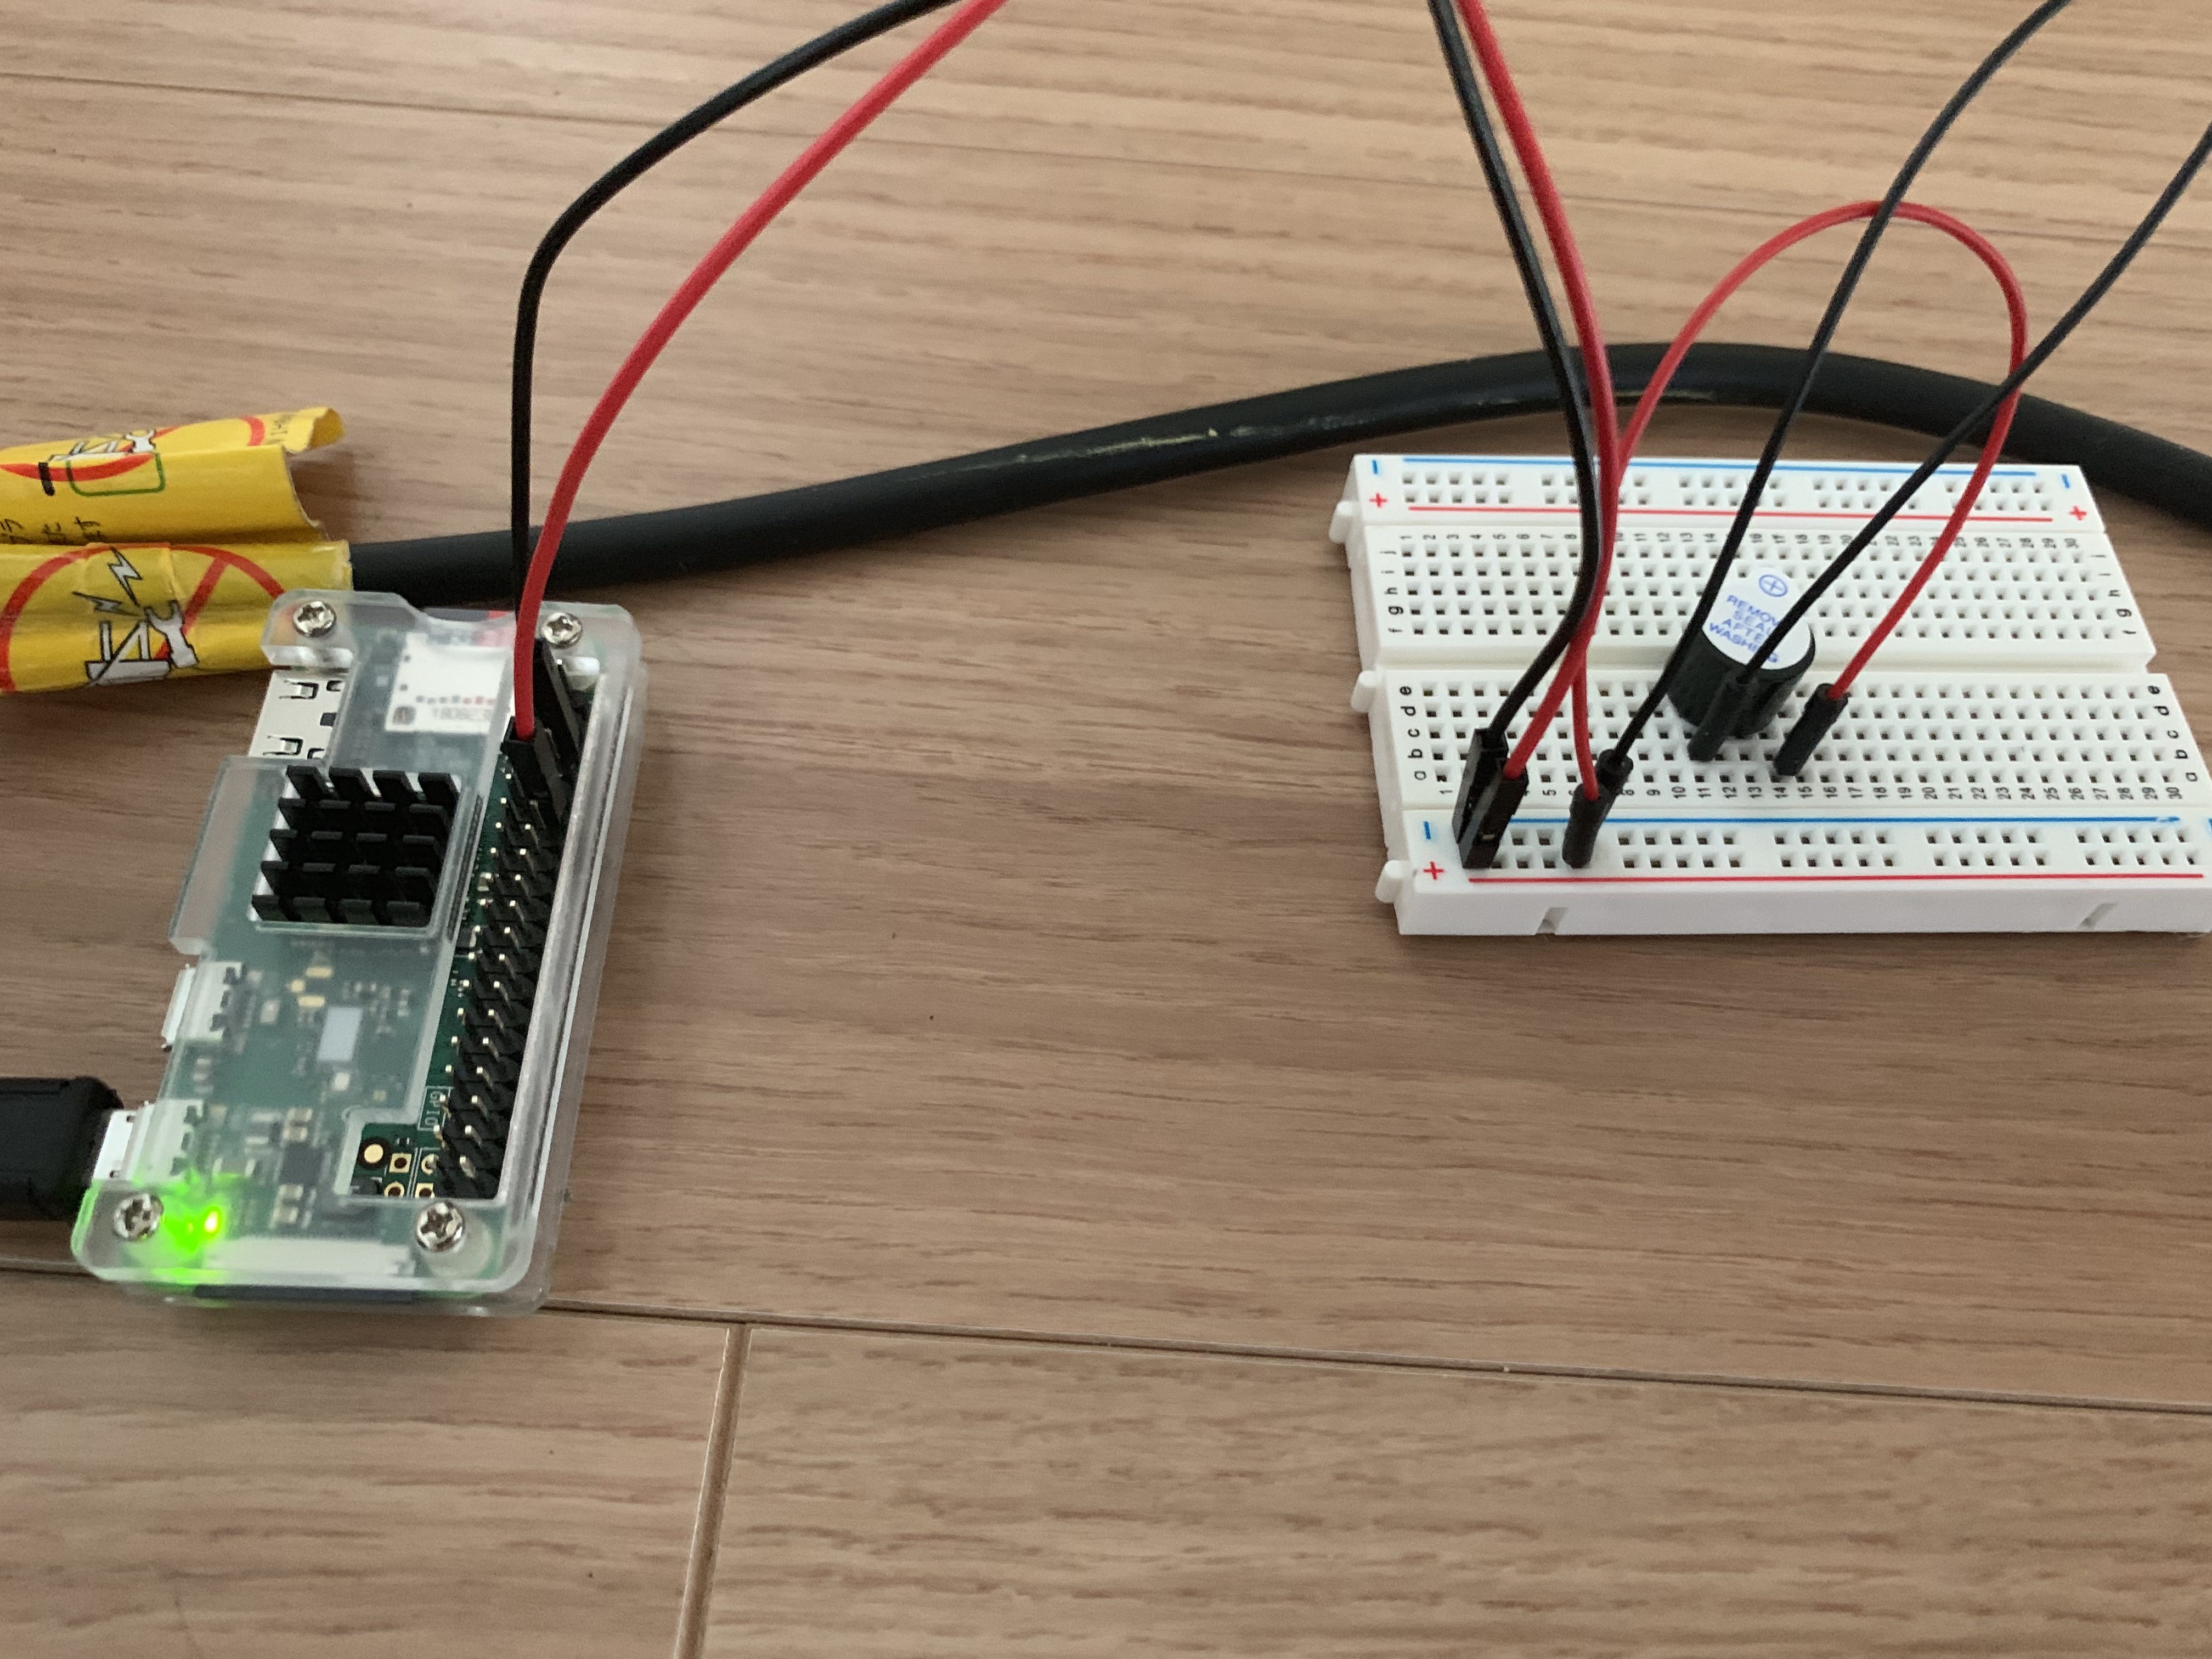
It’s easy to test. Plug it with the 3.3V power source to make the noise. The setup with the GPIO is also simple. Just make sure the buzzer is in the correct direction.
The software
There will be software running on the RPi, and software running somewhere else that will handle the requests from
my cellphone.
The code on the RPi will:
- Send value to GPIO pin to make the buzzer buzz;
- Listen from new annoyance requests.
To send requests to the raspberry Pi from my cellphone, wherever the place I am, I will use a Telegram bot which has
its code deployed in AWS Lambda. I am using lambda here as an alternative to ec2. It’s not the only way to do it
but it shows how you can use a cheap lambda to create bots (Telegram, Slack…).
Additionally, I will need the AWS API gateway to forward HTTP requests to the correct lambda. I’ll also use a small
DynamoDB to store the requests from my cellphone. The software on the RPI will query this table to see if it needs
to annoy my S.O.
GPIO control with Rust on the RPI
There is already a crate for that, but in my case I’ll just write the code from scratch as the use case is really
simple.
Interaction with the GPIO pins is simple with sysfs. Be aware that this interface is deprecated so this example might have to use the new interface in the future…
# activate the gpio pin 18
echo "18" > /sys/class/gpio/export
# Set the direction (output in that case)
echo "out" > /sys/class/gpio/gpio18/direction

# set value high
echo "1" > /sys/class/gpio/gpio18/value
# wait a bit
...
# set value low
echo "0" > /sys/class/gpio/gpio18/value

# deactivate the gpio pin
echo "18" > /sys/class/gpio/unexport
When converting that to Rust, I have:
//! Code to light a led on GPIO pin 18.
//!
use std::fs::OpenOptions;
use std::io::Write;
use std::path::Path;
use std::thread;
use std::time::Duration;

use snafu::{ResultExt, Snafu};

#[derive(Debug, Snafu)]
enum GpioError {
    #[snafu(display("Cannot open file"))]
    CannotOpen { source: std::io::Error },

    #[snafu(display("Cannot write bytes to file: {:?}", bytes))]
    CannotWriteBytes {
        source: std::io::Error,
        bytes: Vec<u8>,
    },
}

struct Pin {
    pin: u8,
}

const EXPORT_PATH: &'static str = "/sys/class/gpio/export";
const UNEXPORT_PATH: &'static str = "/sys/class/gpio/unexport";

pub enum Direction {
    In,
    Out,
}

pub enum Value {
    On,
    Off,
}

fn write_to_file<P: AsRef<Path>>(filepath: P, content: &str) -> Result<(), GpioError> {
    let mut file = OpenOptions::new()
        .write(true)
        .open(filepath)
        .context(CannotOpen {})?;
    file.write_all(content.as_bytes())
        .context(CannotWriteBytes {
            bytes: Vec::from(content.as_bytes()),
        })?;
    Ok(())
}

impl Pin {
    pub fn new(pin: u8) -> Self {
        Self { pin }
    }

    /// Will activate the GPIO pin. If was already activated, this will
    /// just return Ok.
    pub fn export(&self) -> Result<(), GpioError> {
        if !Path::new(&format!("/sys/class/gpio/gpio{}", self.pin)).exists() {
            write_to_file(EXPORT_PATH, &format!("{}", self.pin))
        } else {
            Ok(())
        }
    }

    /// Will deactivate the GPUI pin. If was already deactivate, this will
    /// just return OK.
    pub fn unexport(&self) -> Result<(), GpioError> {
        if Path::new(&format!("/sys/class/gpio/gpio{}", self.pin)).exists() {
            write_to_file(UNEXPORT_PATH, &format!("{}", self.pin))
        } else {
            Ok(())
        }
    }

    /// Set direction (IN or OUT).
    pub fn set_direction(&self, direction: Direction) -> Result<(), GpioError> {
        match direction {
            Direction::In => {
                write_to_file(format!("/sys/class/gpio/gpio{}/direction", self.pin), "in")
            }
            Direction::Out => {
                write_to_file(format!("/sys/class/gpio/gpio{}/direction", self.pin), "out")
            }
        }
    }

    /// Set either "1" or "0" to the GPIO pin.
    pub fn set_value(&self, value: Value) -> Result<(), GpioError> {
        match value {
            Value::On => write_to_file(format!("/sys/class/gpio/gpio{}/value", self.pin), "1"),
            Value::Off => write_to_file(format!("/sys/class/gpio/gpio{}/value", self.pin), "0"),
        }
    }
}

fn main() -> Result<(), GpioError> {
    let led = Pin::new(18);
    led.export()?;
    thread::sleep(Duration::from_millis(100));
    led.set_direction(Direction::Out)?;
    thread::sleep(Duration::from_millis(100));

    for _ in 0..5 {
        led.set_value(Value::On)?;
        thread::sleep(Duration::from_millis(500));
        led.set_value(Value::Off)?;
        thread::sleep(Duration::from_millis(500));
    }

    led.unexport()?;
    Ok(())
}
I am using Snafu for error handling as part of a bigger project, but you can replace the custom errors with Box<std::error::Error> for quick and dirty prototyping.
Telegram bot with AWS Lambda
There are a lot of tutorials on how to create a bot for Telegram on the web. Creating a new bot is easy. Just send a message to the BotFather and
it will create a new bot and send you your bot token (that you should not share ;) ).
Every time somebody is sending a message to your bot, Telegram will keep it in its server for 24h and will wait for you to get them before removing them. There are two way to get messages sent to your bot:
- Poll telegram for updates
- Configure a webhook: an HTTP endpoint to which Telegram will try to send the update.
AWS basics
The second way works pretty well with AWS Lambda. The lambda is just a piece of code that will be run on AWS servers. You can run up to a million lambda a month for free instead of having you own server. When using Lambda, you often have to use other AWS services for integration. For example, if you want to trigger your piece of code from an HTTP requests, you need to use the API Gateway of AWS to forward the HTTP request to the lambda. If you want to keep some state, you need to use another service for that (S3, DynamoDB for example). On the bright side, AWS provides the free tiers, which means that if you keep your services usage below a certain threshold, you won’t pay anything.
Free tiers usage (roughly, please check details on AWS website):
- Lambda: 1M requests/month
- API Gateway: 1M API calls/month
- DynamoDB: 25Gb, 200M requests/month
It’s well enough for the kind of joke I want to do.
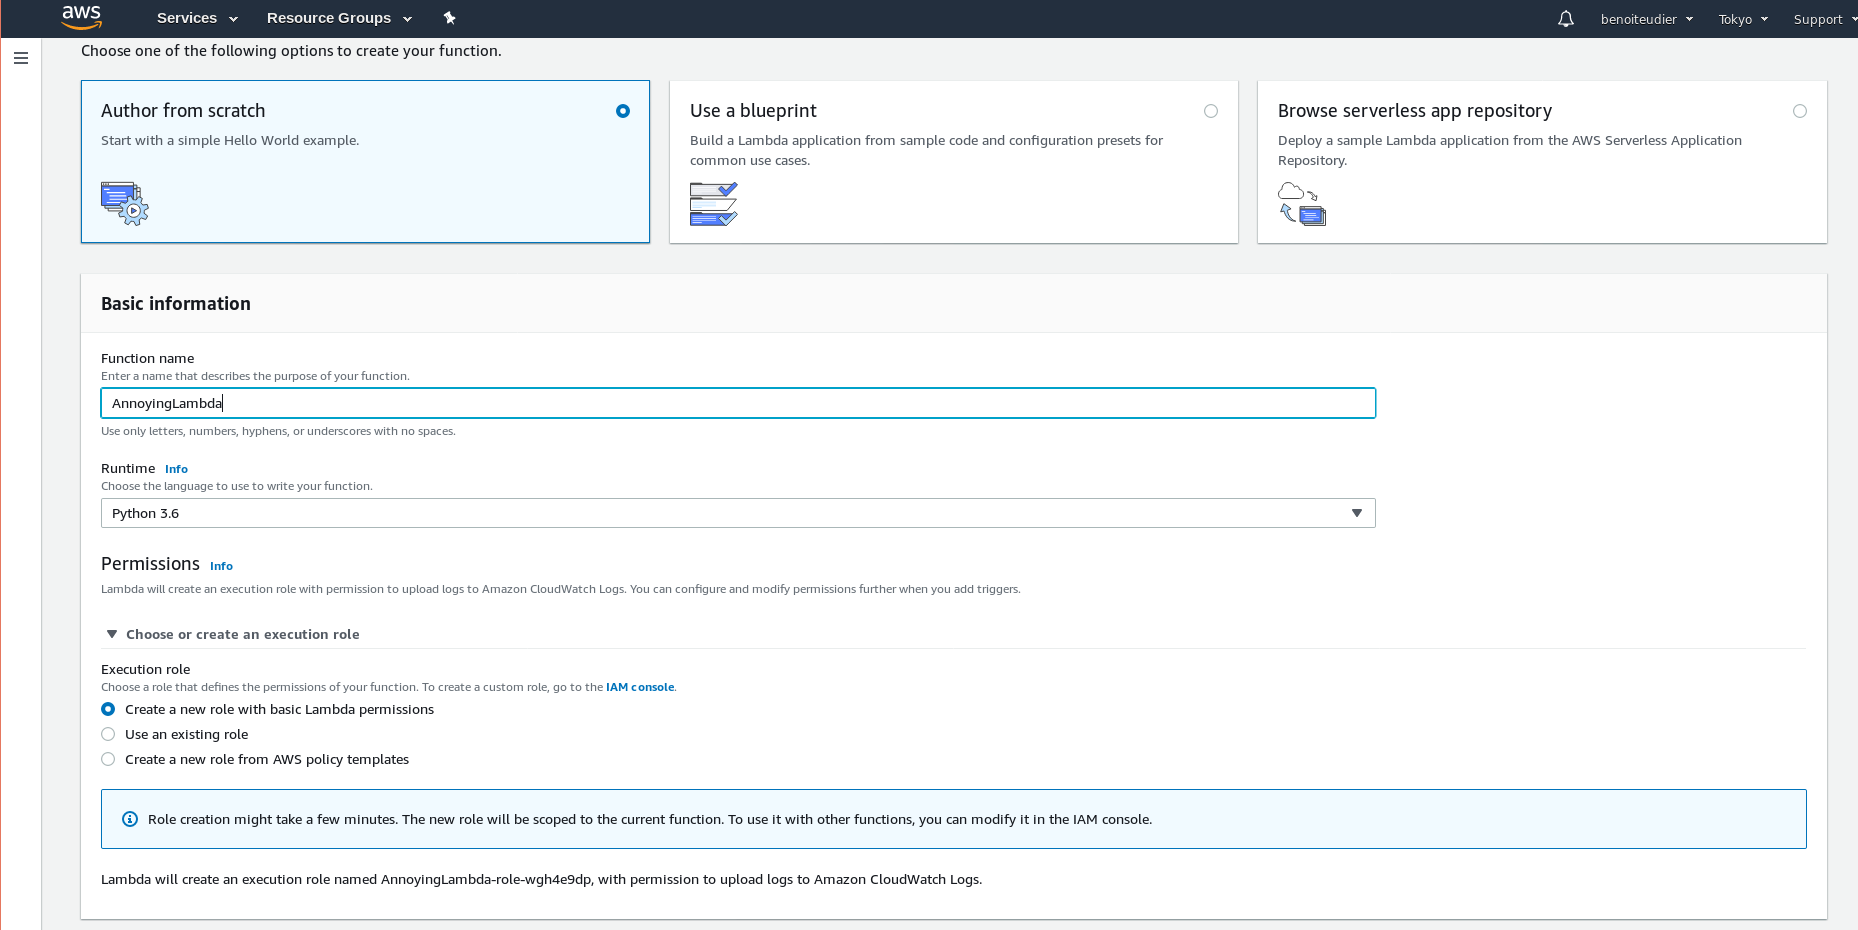
The first thing to do is to create a Lambda. On AWS GUI, you can choose what language to use and what permissions to give to the Lambda. For now, I’ll choose python and will give the standard permissions to lambda. Later, I will need to add the DynamoDB access.
The Lambda expects you to provide a handler that will be run when the lambda is triggered. The basic example of handler is:
import json

def lambda_handler(event, context):
    # TODO implement
    return {
        'statusCode': 200,
        'body': json.dumps('Hello from Lambda!')
    }
Now, I am going to create a new API to access this Lambda. This is done via the API gateway.
Just add a new resource which will be the endpoint for the Telegram webhook. Telegram advices to use your bot token as an endpoint
so let’s do it. Then, add a method for the endpoint. The method corresponds to the HTTP method. It will tell AWS how to handle GET, POST (and so on)
requests that are sent to our resource. Telegram will post the updates to our endpoint. When creating the method, you can choose what to
do when AWS receives a request. In this case, you can choose to forward to your lambda by choosing Lambda proxy. I am going a bit fast here but there
are a ton of AWS tutorials on the web.

When you deploy your API gateway and post some data to the endpoint you defined previously, you should get the return value from the lambda. (Hello from Lambda!)
Telegram bot code
First thing to do is to register your bot webhook (the endpoint from AWS). There are a lot of details here.
I did it simply with python’s request.
import requests

# Certificate is a public certificate from AWS
data = { 'url': 'mysecretendpoint', 'certificate': open(certificate_path) }

requests.post(f'https://api.telegram.org/bot{TOKEN}/setWebhook', data=data)
I downloaded the certificate from the web browser when access a GET endpoint of the API Gateway. Not sure it is needed…
The requests should return a status 200. If that is the case, you can check that the Lambda is correctly triggered by sending a message to your bot.
Telegram sends a post request that contains an Update to your endpoint. The update contains information about who sent the message and what is the
content of the message. You can find the details in the Telegram API documentation.
The documentation is pretty well made so you can easily do stuff such as an echo bot.
from botocore.vendored import requests
import json

URL = 'https://api.telegram.org/bot_with_you_token/sendMessage'

def lambda_handler(event, context):

    body = json.loads(event['body'])

    # Process only if myself
    text = body['message']['text']
    chat_id = body['message']['chat']['id']
    requests.post(URL, data={'chat_id': chat_id, 'text': text})

    return {
        'statusCode': 200,
        'body': json.dumps('Hello from Lambda!')
    }
Maybe you do not want everybody to be able to get the echo message? In that case, you can filter by user as the user ID is available
from body['message']['from']['id'].
The complete Lambda code is the following:
import json
import os
import datetime
import pytz
from botocore.vendored import requests

import boto3
dynamodb = boto3.resource('dynamodb')

TOKEN =  os.environ['TELEGRAM_TOKEN']
URL = f'https://api.telegram.org/bot{TOKEN}/sendMessage'

def get_allowed_users():
    liststr = os.environ['ALLOWED_USERS']
    return [int(x) for x in liststr.split(',')]

# This is a workaround for: http://bugs.python.org/issue16535
class DecimalEncoder(json.JSONEncoder):
    def default(self, obj):
        if isinstance(obj, decimal.Decimal):
            return int(obj)
        return super(DecimalEncoder, self).default(obj)


def create_entry(dt: str):
    """ Will create a new entry in the dynamotable. Key will be the current
    datetime"""
    table = dynamodb.Table(os.environ['DYNAMODB_TABLE'])
    item = {
        'datetime': dt,
        'request': 'sound',
    }
    # the primary key is request.
    table.put_item(Item=item)


def send_msg(chat_id, msg):
    r = requests.post(URL, data={'chat_id': chat_id, 'text': msg})
    print(r.text)

def lambda_handler(event, context):

    body = json.loads(event['body'])

    # Process only if myself
    user_id = body['message']['from']['id']
    if user_id in get_allowed_users():
        text = body['message']['text']
        chat_id = body['message']['chat']['id']
        if text.startswith('/sound'):
            now = datetime.datetime.now()
            tz = pytz.timezone('Asia/Tokyo')
            now = tz.localize(now)
            create_entry(now.isoformat())
            msg = f"OK I RECEIVED YOUR REQUEST AT {now.isoformat()}"
        else:
            msg = 'Type /sound to prank you friends'
        send_msg(chat_id, msg)

    return {
        'statusCode': 200,
        'body': json.dumps('Hello from Lambda!')
    }
A few important points:
- I use a third-party python module (
pytz) that is not provided by AWS. To do the same, you can follow these instructions.
- All the sensitive information is set as environment variable on the Lambda.
- The Lambda needs access to the DynamoDB table. This can be done by attaching a policy to the IAM role of your lambda function.
- The dynamo DB table primary key is
request.
RPI polling Lambda
The Raspberry Pi will poll for updates. This can also be done via a Lambda:
import json
import boto3
import json
import decimal
import os

from boto3.dynamodb.conditions import Key

dynamodb = boto3.resource('dynamodb')

# Helper class to convert a DynamoDB item to JSON.
class DecimalEncoder(json.JSONEncoder):
    def default(self, o):
        if isinstance(o, decimal.Decimal):
            if o % 1 > 0:
                return float(o)
            else:
                return int(o)
        return super(DecimalEncoder, self).default(o)


def lambda_handler(event, context):
    table = dynamodb.Table(os.environ['DYNAMODB_TABLE'])
    response = table.scan()

    # could have some problem? I guess. Anyway nobody else is reading/updating these values.
    for r in response['Items']:
        table.delete_item(Key={'request': r['request']})

    print(response)

    return {
        'statusCode': 200,
        'body': json.dumps({'items': response['Items']})
    }
That’s a really hacky way to get all the requests and delete them (what if multiple lambda access at the same time?). It’s not meant for any production system
so that will do the trick. Another resource/method need to be created on the API gateway to give access to that Lambda.
Then, from the Raspberry Pi, reqwest and serde are used to get the latest requests. std::process::Command is used to execute the program created at the beginning of this post.
use serde_derive::{Deserialize, Serialize};
use std::env;
use std::process::Command;
use std::thread;
use std::time::Duration;

#[derive(Debug, Serialize, Deserialize)]
struct Request {
    request: String,
    datetime: String,
}

#[derive(Debug, Serialize, Deserialize)]
struct Response {
    items: Vec<Request>,
}

// Every minute polling
const POLLING_PERIOD: u64 = 5;

fn main() {
    // Some simple CLI args requirements...
    let url = match env::args().nth(1) {
        Some(url) => url,
        None => {
            println!("Usage: client <url>");
            return;
        }
    };

    let duration = Duration::from_secs(POLLING_PERIOD);
    loop {
        let mut res = reqwest::Client::new()
            .get(&url)
            .send()
            .expect("Cannot send get req");

        let response: Response = res.json().expect("Cannot deserialize");

        println!("{:?}", response);
        if response.items.len() != 0 {
            // TODO Do something different based on the request.
            Command::new("./led").output().expect("hi");
        }
        thread::sleep(duration);
    }
}
In Summary
- The RPi is constantly polling an AWS Lambda for new requests
- New requests are sent via a Telegram bot
- Telegram will forward the requests to an endpoint configured beforehand.
- This endpoint will trigger a lambda that will store the request for our RPi.
- The RPi will make an annoying sound when it receives a new request. The sound is triggered via GPIO pins and an active buzzer.
So much fun.
23 Sep 2019
It is time for the favorite Rust crates, 2019 edition!
This post will focus mostly on Web technologies as I’ve been using Rust more and more in my daily work (ssh that’s a secret :D).
Logging with tracing
Formerly part of the tokio crates, tracing provides a way to instrument your code to collect structure information about what
is happening. This can be used for logging or measuring timing for example.
Here is an example, courtesy of the tracing github repository.
#![deny(rust_2018_idioms)]
use tracing::{debug, error, info, span, trace, warn, Level};

use std::{error::Error, fmt};

#[tracing::instrument]
pub fn shave(yak: usize) -> Result<(), Box<dyn Error + 'static>> {
    debug!(
        message = "hello! I'm gonna shave a yak.",
        excitement = "yay!"
    );
    if yak == 3 {
        warn!(target: "yak_events", "could not locate yak!");
        Err(ShaveError::new(yak, YakError::new("could not locate yak")))?;
    } else {
        trace!(target: "yak_events", "yak shaved successfully");
    }
    Ok(())
}

pub fn shave_all(yaks: usize) -> usize {
    let span = span!(Level::TRACE, "shaving_yaks", yaks_to_shave = yaks);
    let _enter = span.enter();

    info!("shaving yaks");

    let mut num_shaved = 0;
    for yak in 1..=yaks {
        let res = shave(yak);
        trace!(target: "yak_events", yak, shaved = res.is_ok());

        if let Err(ref error) = res {
            error!(
                message = "failed to shave yak!",
                yak,
                error = error.as_ref()
            );
        } else {
            num_shaved += 1;
        }

        trace!(target: "yak_events", yaks_shaved = num_shaved);
    }

    num_shaved
}

#[derive(Debug)]
struct ShaveError {
    source: Box<dyn Error + 'static>,
    yak: usize,
}

impl fmt::Display for ShaveError {
    fn fmt(&self, f: &mut fmt::Formatter<'_>) -> fmt::Result {
        write!(f, "shaving yak #{} failed!", self.yak)
    }
}

impl Error for ShaveError {
    fn source(&self) -> Option<&(dyn Error + 'static)> {
        Some(self.source.as_ref())
    }
}

impl ShaveError {
    fn new(yak: usize, source: impl Into<Box<dyn Error + 'static>>) -> Self {
        Self {
            source: source.into(),
            yak,
        }
    }
}

#[derive(Debug)]
struct YakError {
    description: &'static str,
}

impl fmt::Display for YakError {
    fn fmt(&self, f: &mut fmt::Formatter<'_>) -> fmt::Result {
        write!(f, "{}", self.description)
    }
}

impl Error for YakError {}

impl YakError {
    fn new(description: &'static str) -> Self {
        Self { description }
    }
}
Instrumentation (span, info, …) will send events that are handled by a subscriber. In this code, the subscriber just log the event to the
console, but some subscribers such as tracing-timing will provide information
about event timing.
Currently, I mostly use the provided FmtSubscriber but I might in the future implement my own to push events to third-party services such
as ElasticSearch.
Error handling with Snafu
I really like Rust explicit error handling but sometimes I need to write a lot of boilerplates to convert errors from
other crate to my application error. Of course, one solution is to convert everything to Box<Error> but Snafu provides
an easy way to get started with clean error handling from the start of a new project.
Let’s take a look at an example, heavily inspired by this great article by BurntSushi.
use snafu::{ResultExt, Snafu};

/// Our custom error. Here, no need to implement Display, Error and so on.
/// Everything is handled by the proc macro
#[derive(Debug, Snafu)]
enum CliError {
    #[snafu(display("Cannot read file: {}", filename))]
    CannotReadFile { source: std::io::Error, filename: String },

    #[snafu(display("Cannot read to string: {}", filename))]
    CannotReadToString { source: std::io::Error, filename: String },

    // the ParseIntError will already contain the string value
    #[snafu(display("Cannot convert string to integer"))]
    CannotConvertToInt { source: std::num::ParseIntError },

    // Can also create variant without a source
    #[snafu(display("Input integer is too small: got {}, expected large than 10", value))]
    IntTooSmall { value: u8 },
}
This is all I need to create a custom error. The source field is a bit of a magic field for Snafu. It
is basically the underlying error. A function that returns a result with this underlying error can
be convert to my custom error by adding some context information.
For example,
fn file_double(file_path: &str) -> Result<i32, CliError> {
    let mut file = File::open(file_path).context(CannotReadFile { filename: String::from(file_path) })?;
    let mut contents = String::new();
    file.read_to_string(&mut contents).context(CannotReadToString { filename: String::from(file_path)})?;
    let n: u8 = contents.trim().parse().context(CannotConvertToInt {})?;

    // ensure is a macro that will return the error is a condition is not satisfied
    ensure!(n >= 10, IntTooSmall { value: n });

    Ok(2 * n)
}
It is a bit more verbose than the version with std::convert::From. However, you have the possibility to add more
context information to the error which would help you create more precise error messages.
I tried the traditional way to create Errors with the standard library. I also tried the Failure crate which confused
me with different types :’). So far, Snafu is really easy to get started, reduce a lot of boilerplate and helps providing
precise and specific error messages.
Wasm outside the web browser with wasmer-runtime
For some reason I am super fascinated by embedding interpreters within my Rust code. I have tried Lua (see here). I have
also experience rust-cpython with success but what irks me is the lack of static typing. I know, some people use interpreters
so that they can quickly create scripts with having to bother with a compiler and its annoying error messages.
For me, static typing equates to safety and sleep without worry, so I was delighted when I heard about wasmer-runtime which
allows me to run pre-compiled Wasm modules within my Rust code.
Somebody already wrote a really complete guide on how to do it so you really should take a loot at https://wiredforge.com/blog/wasmer-plugin-pt-1.
12 Jul 2019
Just putting that here as a reference ;) Remote servers are running Ubuntu 18.
- name: Add an apt key for Docker
      apt_key:
        url: https://download.docker.com/linux/ubuntu/gpg
        state: present

- name: Add docker repository
  apt_repository:
    repo: deb [arch=amd64] https://download.docker.com/linux/ubuntu bionic stable
    state: present

- name: Install Docker and docker-compose
  apt:
    name: "{{ packages }}"
    state: present
    update_cache: yes
  vars:
    packages:
      - docker-ce
      - docker-compose

- name: Add existing user to the docker group
  user:
    name: "{{ ansible_user }}"
    groups: docker
    append: yes
16 Jun 2019
Testing is important. As complexity builds up in an application, it is also very easy to give up automated testing. The tests are more and more complicated to create and maintain, tests work on local machines with custom setup up but fail every now and then on CI tools…
Today I won’t try to solve all these issues (sorry), but I’ll show an easy way to do integration testing with a real database. I’ll write about diesel, migrations, test strategy and RAII in rust so if any of these topics interests you, stay tuned!
Setting up a Diesel project
You can quickly set up a project that uses a database with Diesel. In my case, I use postgres so I only applied the postgres specific steps.
You’ll need a database. I’m using docker-compose to start a postgres database and a GUI (adminer) to explore the tables. Feel free to use it.
version: '3.1'

services:

  db:
    image: postgres
    restart: always
    environment:
      POSTGRES_USER: postgres
      POSTGRES_PASSWORD: example
    ports:
      - 5432:5432

  adminer:
    image: adminer
    restart: always
    ports:
      - 8081:8080
This post is not about using Diesel (more like testing diesel) so I’ll assume that you’ll have an User table for the next steps.
This is my user structure by the way:
/// Represent an user for our application.
#[derive(Debug, Queryable)]
#[table_name = "users"]
pub struct User {
    pub id: i32,
    pub email: String,
    pub name: String,
    pub password: String,
}

impl User {
    /// Return an user by its ID. It might return no user if there
    /// is no match. In that case, Result is None.
    ///
    pub fn get_user_by_email(
        conn: &PgConnection,
        email: String,
    ) -> Option<User> {
        use crate::schema::users::dsl::*;
        users
            .filter(email.eq(email))
            .first(conn)
            .optional().unwrap()
    }
}
Test strategy
For integration tests, I want to do the testing as close as it will be in reality. The database will be similar to production database. One way to separate integration testing from production is simply to have a database dedicated to testing.
Tests can also be done in parallel so that it takes less time to run the test suite. For that reason, I cannot use the same database for all tests. Each test will have its own database. Each test will also clean up nicely after it is done so that we don’t have hundred of databases after executing the test suite.
To summarize:
- Each test will have its own database
- Before a test begins, a database will be created and all the migrations will be applied
- After a test ends, the database will be dropped.
No fixture? Drop trait at the rescue
Rust does not really provide a testing framework with fixture and mocking so I need to implement my own fixtures. A popular pattern is to use the Drop trait to tear-up resources when the test ends.
Basically, you create an object that will set up resources. Let’s call it a TestContext. This object will implement the Drop trait, so when it goes out of scope, his drop method will be called and will clean up the resources. This is similar to RAII in c++.
In practice,
struct TestContext {}

impl TestContext {

        fn new() -> Self {
                println!("Set up resources");
                Self {}
        }

}

impl Drop for TestContext {
        fn drop(&mut self) {
                println!("Clean up resources");
        }
}


#[test]
fn try_it() {
        // Needs to be created first.
        let _ctx = TestContext::new();

        // Do your test here
}
Setup/Cleanup database
Now I can fill the new and drop functions.
new will connect to postgres database which is a default database in Postgres. It is used when you don’t have a database yet but want to execute some SQL. Then it will execute some raw SQL to create a new test database.
It looks likes:
// Keep the databse info in mind to drop them later
struct TestContext {
        base_url: String,
        db_name: String,
        }

impl TestContext {
        fn new(base_url: &str, db_name: &str) -> Self {
                // First, connect to postgres db to be able to create our test
            // database.
            let postgres_url = format!("{}/postgres", base_url);
            let conn =
                PgConnection::establish(&postgres_url).expect("Cannot connect to postgres database.");

            // Create a new database for the test
            let query = diesel::sql_query(format!("CREATE DATABASE {}", db_name).as_str());
            query
                .execute(&conn)
                .expect(format!("Could not create database {}", db_name).as_str());


                Self {
                        base_url: base_url.to_string(),
                        db_name: db_name.to_string(),
                }
        }
}
drop will drop the database.
impl Drop for TestContext {

    fn drop(&mut self) {
        let postgres_url = format!("{}/postgres", self.base_url);
        let conn =
            PgConnection::establish(&postgres_url).expect("Cannot connect to postgres database.");

        let disconnect_users = format!(
            "SELECT pg_terminate_backend(pid)
FROM pg_stat_activity
WHERE datname = '{}';",
            self.db_name
        );

        diesel::sql_query(disconnect_users.as_str())
            .execute(&conn)
            .unwrap();


        let query = diesel::sql_query(format!("DROP DATABASE {}", self.db_name).as_str());
        query
            .execute(&conn)
            .expect(&format!("Couldn't drop database {}", self.db_name));
    }
}
There is some specific code for postgres. Postgres will refuse to delete a database if there is any connected user. It’s possible depending on your test that a connection is still opened to the database. In that case, the SQL query supplied above will mercilessly disconnect them from the database.
Now, if you run the test now, it should create a database and remove it as expected. Comment out the drop implementation if you need some convincing ;).
Next step is to run the migrations so that the users table will be available during the test. There is a crate named diesel-migrations that contains a macro to execute the migrations in a specific folder. So add diesel_migrations = "1.4.0" to your Cargo file, and add:
#[macro_use]
extern crate diesel_migrations;
use diesel_migrations::embed_migrations;

embed_migrations!("migrations/");
Where migrations is the folder created by the diesel cli.
Now, you just have to connect to your new database and use embed_migrations to run the migrations.
// .... in new
    // Now we can connect to the database and run the migrations
    let conn = PgConnection::establish(&format!("{}/{}", base_url, db_name))
        .expect(&format!("Cannot connect to {} database", db_name));

    embedded_migrations::run(&conn);
// ....
And this is it! You can run integration tests that include a database connection without having to worry. I’m pretty sure all of this is can be used with various database backends but I’ll leave that exercise to the reader.
#[test]
fn insert_user_test() {
    let _ctx = setup_database("postgres://postgres:example@127.0.0.1", "sometest1");

    let conn = PgConnection::establish(&format("postgres://postgres:example@127.0.0.1/sometest1"))
        .unwrap();

    // Now do your test.
    diesel::sql_query(
        "INSERT INTO users (email, name, password) VALUES ('MAIL', 'NAME', 'PASSWORD')",
    )
    .execute(&conn)
    .unwrap();
    let u = User::get_user_by_email(&conn, "MAIL".to_string())
        .unwrap()
        .unwrap();

    assert_eq!(u.name, "NAME".to_string());
    assert_eq!(u.password, "PASSWORD".to_string());
}


#[test]
fn remove_user_test() {
    let _ctx = setup_database("postgres://postgres:example@127.0.0.1", "sometest2");

    let conn = PgConnection::establish(&format("postgres://postgres:example@127.0.0.1/sometest2"))
        .unwrap();


        // Run the test ...

}
Oh and by the way, if you want to use the TestContext in multiple test files, you will need to put it as common code. Because every file in tests/ is compiled as a single crate, you will need to put the common code in tests/common/mod.rs and add the common module to each of your test files.